
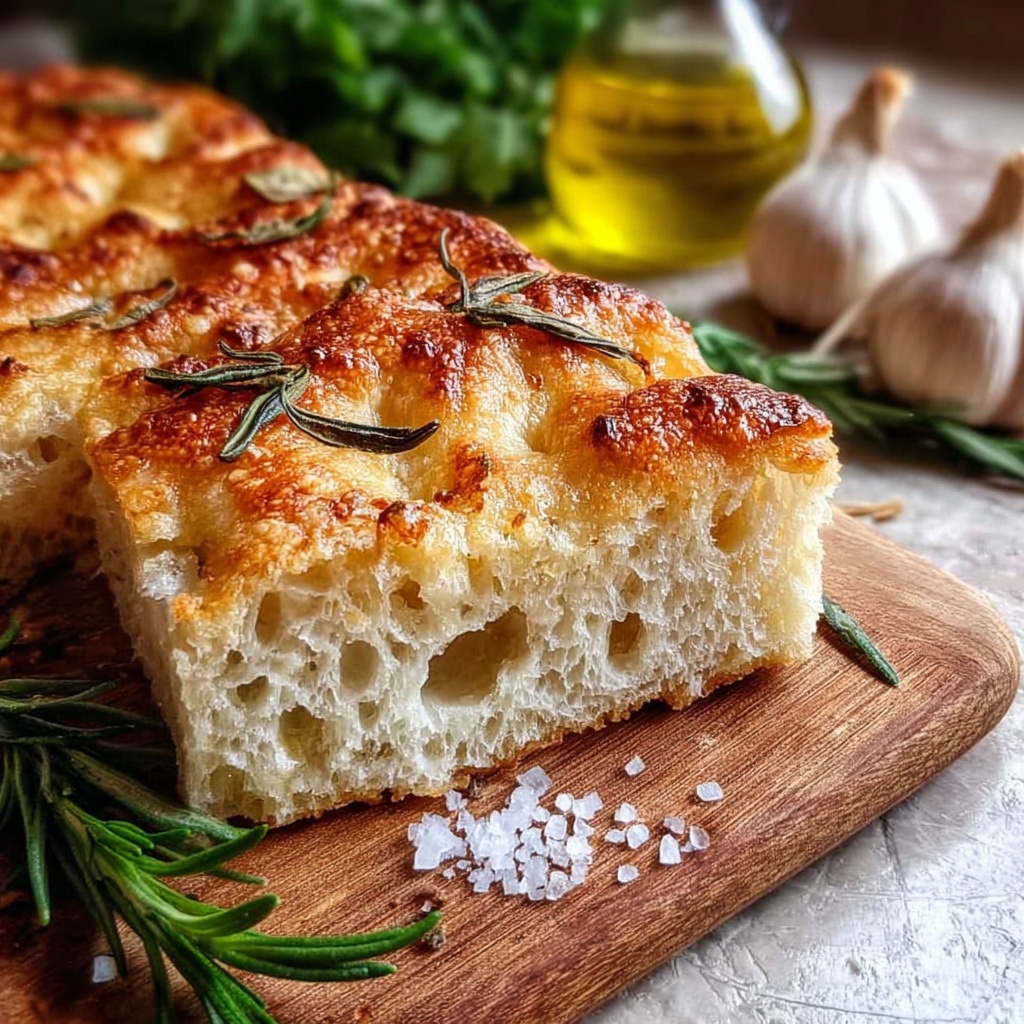
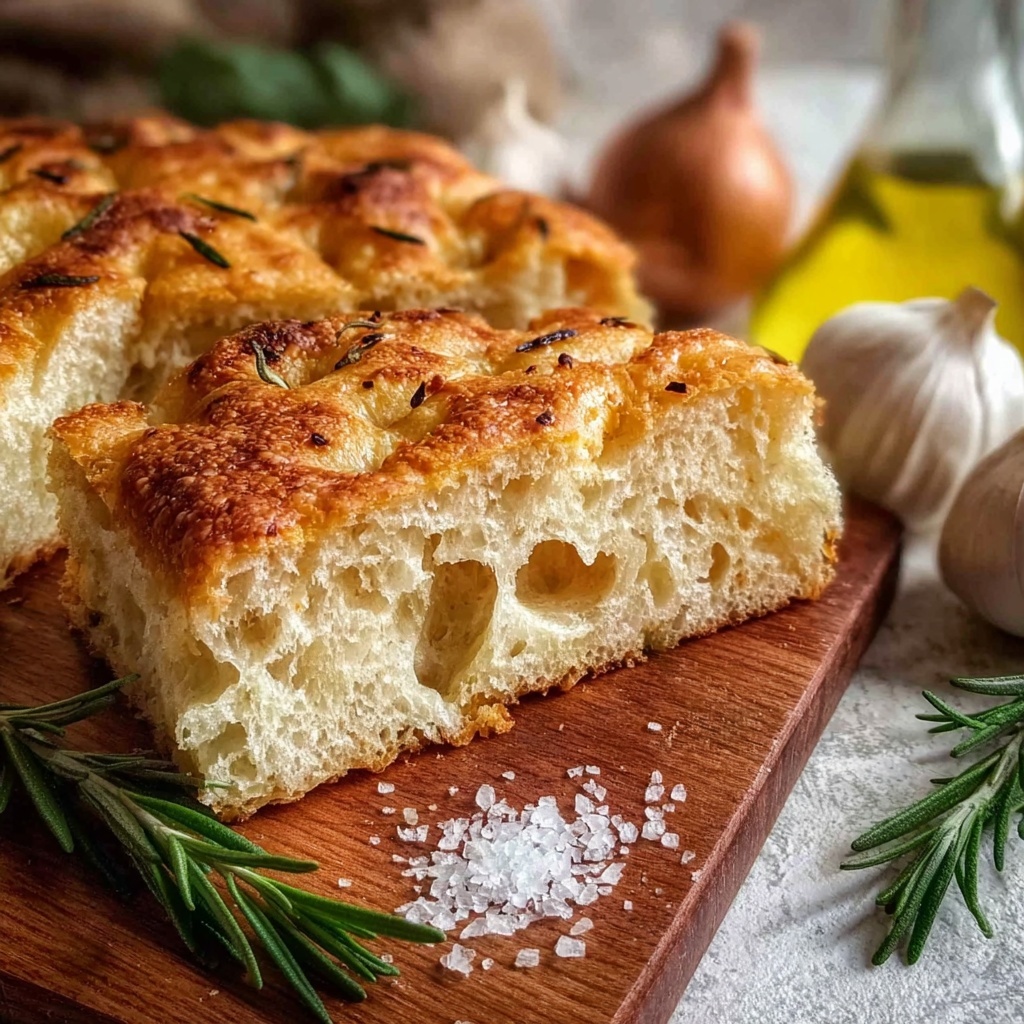
There is something truly magical about baking your own bread at home, especially when it’s packed with the fragrant flavors of rosemary and roasted garlic. This Rosemary & Roasted Garlic Artisan Bread Recipe captures that warm, rustic charm perfectly. The aromatic rosemary marries beautifully with the mellow, caramelized notes of roasted garlic, creating a loaf that’s crispy on the outside and wonderfully tender inside. It’s the kind of bread that transforms any meal into a heartfelt experience—whether you’re enjoying it fresh from the oven with a bit of butter or serving it alongside a hearty stew. Let’s dive into making this homey, flavorful masterpiece!
Ingredients You’ll Need
This Rosemary & Roasted Garlic Artisan Bread Recipe calls for simple, pantry-friendly ingredients that come together effortlessly. Each element plays a key role—from the warm water that awakens the yeast to the fresh rosemary that adds an herbaceous note, every ingredient shapes the taste, texture, and character of the bread.
- 3 cups all-purpose flour: The foundation of your loaf, providing structure and crumb.
- 1 1/4 cups warm water (about 110°F): Activates the yeast and hydrates the flour for perfect dough consistency.
- 2 teaspoons active dry yeast: The magical rising agent that gives your bread its airy texture.
- 1 teaspoon salt: Enhances the flavors and controls yeast activity.
- 1 tablespoon sugar: Feeds the yeast for a lively rise and subtle sweetness.
- 2 tablespoons olive oil: Adds moisture and richness to the crumb.
- 2 tablespoons fresh rosemary, finely chopped: Infuses the dough with a fragrant herbal punch.
- 1 head of garlic: Roasted to mellow buttery softness that elevates the bread deeply.
- Extra olive oil for roasting garlic: Ensures your garlic roasts golden and tender, ready to spread luxury in every bite.
- Additional flour for dusting: Prevents sticking while kneading and shaping the dough.
How to Make Rosemary & Roasted Garlic Artisan Bread Recipe
Step 1: Roast the Garlic
Begin this delicious journey by roasting your garlic. Preheat your oven to 400°F. Trim the top off the garlic head just enough to expose the cloves, drizzle with olive oil, then wrap it tightly in aluminum foil. Slide it into the oven and let it roast for 30 to 35 minutes. The cloves will transform into soft, golden pockets bursting with sweet, mellow flavor. Once cool, squeeze them out into a bowl and mash with a fork—this roasted garlic adds a subtle richness that sets this bread apart.
Step 2: Activate the Yeast
While your garlic cools, mix the warm water, sugar, and active dry yeast in a large bowl. Give it a gentle stir and let it sit for 5 to 10 minutes until the surface becomes foamy and alive with bubbles. This foaming action shows the yeast is ready to work its magic, ensuring that perfect rise in your loaf.
Step 3: Combine Flavors
Into this yeast mixture, stir in the mashed roasted garlic, olive oil, and salt. These ingredients blend aromas and flavors that will resonate through every bite of your bread.
Step 4: Form the Dough
Gradually incorporate the all-purpose flour into the wet ingredients, adding it one cup at a time. Stir gently until a rough, shaggy dough forms. This step keeps the dough from becoming tough and encourages a tender crumb.
Step 5: Knead to Perfection
Turn the dough out onto a lightly floured surface and knead it for 8 to 10 minutes. With each fold and stretch, you’re developing the gluten that gives bread its structure and chewiness. The dough will become smooth and elastic, ready to rise beautifully.
Step 6: Infuse with Fresh Rosemary
As you near the end of kneading, sprinkle in the finely chopped fresh rosemary. Knead just enough to distribute the herb evenly throughout the dough. These fragrant green flecks will shine through both taste and appearance once baked.
Step 7: First Rise
Place the dough in a well-oiled bowl, cover it with a damp cloth, and find a warm spot to let it rise. Patience here is key—allow 1 to 2 hours for the dough to double in size, developing flavor and airy texture.
Step 8: Shape the Loaf
Once risen, gently punch down the dough to release trapped gases. Shape it into your favorite loaf shape—classic round, oval, or even a rustic freeform. Set the shaped dough on a parchment-lined baking sheet, preparing it for the final rise.
Step 9: Second Rise
Again cover the dough with a cloth and let it rise for another 30 to 45 minutes. This rest allows the bread to puff up once more, promising a light interior.
Step 10: Prep for Baking
While the dough is rising, preheat your oven to 375°F. Just before baking, use a sharp knife to make a few shallow slashes across the top of the loaf; this step is not only decorative but also essential for letting steam escape, promoting a crisp crust.
Step 11: Bake the Bread
Pop your masterpiece into the preheated oven and bake for 25 to 30 minutes. Watch for that golden brown crust and listen for a hollow sound if you tap the bottom—the telltale signs that the bread is perfectly baked.
Step 12: Cool Before Slicing
Once baked, transfer the bread to a wire rack to cool completely before slicing. This resting period finishes the cooking warmth inside and lets the crumb set, ensuring beautiful slices without squishing.
How to Serve Rosemary & Roasted Garlic Artisan Bread Recipe
Garnishes
To elevate your serving, brush the crust lightly with extra virgin olive oil or a soft spread of herb butter. A sprinkle of flaky sea salt can add texture and highlights that make each bite sing. Fresh rosemary sprigs placed nearby create an inviting, aromatic presentation.
Side Dishes
This artisan bread partners wonderfully with almost anything! It’s divine alongside creamy soups like tomato bisque or roasted butternut squash, pairs beautifully with a rich beef stew, or serves as the perfect canvas for an antipasto platter featuring cheeses, olives, and charcuterie. A fresh green salad with vinaigrette balances the richness of the garlic and olive oil flavors.
Creative Ways to Present
For a charming presentation, slice the bread thickly and toast slices lightly before drizzling with olive oil and a sprinkle of Parmesan cheese for a quick bruschetta base. Alternatively, hollow out a loaf to create an edible dip bowl for warm spinach-artichoke dip. Sharing this loaf at a cozy gathering instantly sparks conversation and comfort.
Make Ahead and Storage
Storing Leftovers
Your freshly baked Rosemary & Roasted Garlic Artisan Bread Recipe stays fresh at room temperature if wrapped in a clean kitchen towel and stored in a breadbox or paper bag for 2 to 3 days. This method maintains the crust’s crispness while preventing the crumb from drying out.
Freezing
If you want to keep the bread longer, slice it first and freeze in an airtight container or zip-top bag. Freezing preserves flavor and texture for up to 3 months. When you’re ready, simply take out the number of slices you need.
Reheating
The best way to reheat this artisan bread is to toast slices directly or warm the whole loaf in a 350°F oven wrapped loosely in foil for 10 to 15 minutes. This restores the crust’s crunch and refreshes the heavenly roasted garlic aroma.
FAQs
Can I use dried rosemary instead of fresh?
You can substitute dried rosemary, but fresh rosemary delivers a brighter, more aromatic flavor that really elevates this bread. If using dried, reduce the quantity to about one tablespoon since dried herbs are more concentrated.
Is it necessary to roast the garlic? Can I use raw garlic instead?
Roasting garlic mellows its flavor, making it sweeter and less pungent—exactly what you want in this bread. Raw garlic would give a sharper, more intense bite, which might overpower the delicate balance of flavors.
What type of flour works best for this recipe?
All-purpose flour works wonderfully here, offering a tender yet sturdy crumb. You can experiment with bread flour for a chewier texture, but the original recipe’s balance is perfect as is.
Can I make this bread with a bread machine?
While this recipe is designed for hand-kneading, you can adapt it for a bread machine by adding ingredients in the order recommended by your machine and using the dough cycle. Be sure to incorporate the rosemary toward the end to maintain its fresh flavor.
How do I know when the bread is fully baked?
Look for a deep golden crust, and when you tap the bottom of the loaf, it should sound hollow. These cues indicate the bread is baked through and has a perfect texture within.
Final Thoughts
This Rosemary & Roasted Garlic Artisan Bread Recipe is much more than just bread—it’s a warm hug of flavor that brings joy whether shared at the dinner table or enjoyed as a simple snack. Baking it yourself fills your home with irresistible aromas and results in a loaf that tastes like it came from a cozy bakery. I encourage you to try making this bread soon; it’s a truly rewarding experience that will earn you compliments and second helpings every time!
Print
Rosemary & Roasted Garlic Artisan Bread Recipe
- Prep Time: 0h 45m
- Cook Time: 1h 0m
- Total Time: 1h 45m
- Yield: 1 loaf (about 8 slices)
- Category: Bread
- Method: Baking
- Cuisine: Italian-inspired
Description
This Rosemary & Roasted Garlic Artisan Bread combines the earthy aroma of fresh rosemary with the rich, mellow flavor of slow-roasted garlic. Featuring a crispy crust and soft, flavorful interior, this homemade bread is perfect as a savory side or for making gourmet sandwiches.
Ingredients
For the Bread Dough
- 3 cups all-purpose flour
- 1 1/4 cups warm water (about 110°F)
- 2 teaspoons active dry yeast
- 1 teaspoon salt
- 1 tablespoon sugar
- 2 tablespoons olive oil
- 2 tablespoons fresh rosemary, finely chopped
For the Roasted Garlic
- 1 head of garlic
- Extra olive oil for roasting garlic
For Dusting
- Additional flour for dusting
Instructions
- Roast the Garlic: Preheat your oven to 400°F. Cut the top off the garlic head to expose the cloves, drizzle with olive oil, then wrap tightly in aluminum foil. Roast for 30-35 minutes until cloves are soft and golden. Let cool, then squeeze out the cloves and mash them with a fork. Set aside.
- Activate the Yeast: In a large bowl, combine warm water, sugar, and active dry yeast. Let it sit for 5-10 minutes until foamy to activate the yeast.
- Combine Ingredients: Add the mashed roasted garlic, olive oil, and salt to the yeast mixture. Stir well to combine.
- Add Flour: Gradually mix in the all-purpose flour one cup at a time until a shaggy dough forms.
- Knead the Dough: Knead the dough on a lightly floured surface for 8-10 minutes until smooth and elastic.
- Add Rosemary: Incorporate the finely chopped rosemary into the dough during the last few minutes of kneading for even distribution.
- First Rise: Place the dough in a greased bowl, cover with a damp cloth, and let it rise in a warm place for 1-2 hours until doubled in size.
- Shape the Dough: Punch down the risen dough to release air, shape into a loaf, and place on a parchment-lined baking sheet.
- Second Rise: Cover the shaped dough with a cloth and let it rise another 30-45 minutes.
- Prepare for Baking: Preheat oven to 375°F. Before baking, make shallow slashes on the loaf’s surface to allow steam to escape and for visual appeal.
- Bake the Bread: Bake for 25-30 minutes until the crust is golden brown and the loaf sounds hollow when tapped on the bottom.
- Cool Down: Remove the bread from the oven and cool on a wire rack before slicing to ensure the best texture.
Notes
- Ensure the water is warm but not hot to avoid killing the yeast.
- Roasting garlic mellows the flavor and adds sweetness, enhancing the bread’s taste.
- You can substitute fresh rosemary with dried rosemary, but use half the amount as dried is more concentrated.
- For a crispier crust, place a pan of water in the oven while baking to create steam.
- The dough can be frozen after the first rise; thaw and proceed with shaping and second rise before baking.


