
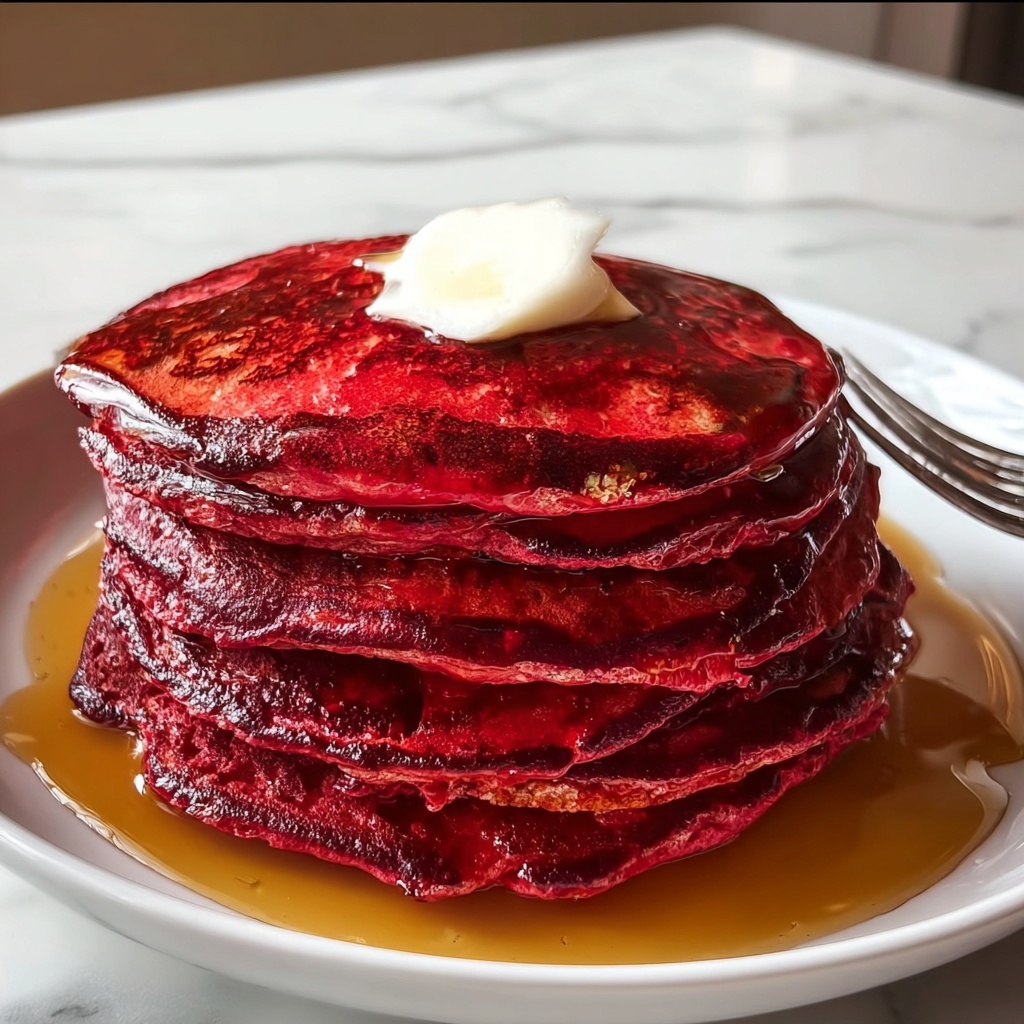
There is something truly magical about waking up to a stack of fluffy, rich red pancakes that not only please the eyes but also delight the taste buds. The Red Velvet Pancakes: 7 Steps to Blissful Breakfast Delights Recipe captures that charm perfectly, combining the classic moistness of red velvet cake with the light, comforting texture of pancakes. Imagine sinking your fork into tender layers with just the right hint of cocoa and that beautiful pop of red food coloring creating a breakfast that’s as festive as it is delicious. Whether it’s a special weekend treat or a way to brighten any ordinary morning, this recipe brings warmth and indulgence to your table with every bite.
Ingredients You’ll Need
These ingredients may sound simple, but each plays a crucial role in making these pancakes rise, shine, and taste incredible. Every element works together to create that perfect balance of texture, flavor, and color that defines this recipe.
- 1 cup all-purpose flour: Acts as the pancake base, providing structure and tenderness.
- 1 tablespoon cocoa powder: Adds a subtle, classic red velvet chocolate flavor.
- 1 tablespoon baking powder: Essential for those light, fluffy pancakes that rise just right.
- 1/2 teaspoon salt: Enhances all the other flavors and balances sweetness.
- 1 cup buttermilk: Gives a gentle tang and contributes to a tender crumb.
- 1 large egg: Binds ingredients and adds richness for a satisfying bite.
- 2 tablespoons vegetable oil: Keeps the pancakes moist and soft without greasiness.
- 1 tablespoon red food coloring: Brings that striking red hue that makes these pancakes unforgettable.
- 1 teaspoon vanilla extract: Deepens flavor with warm, aromatic notes.
How to Make Red Velvet Pancakes: 7 Steps to Blissful Breakfast Delights Recipe
Step 1: Combine the Dry Ingredients
Start by mixing the all-purpose flour, cocoa powder, baking powder, and salt in a large bowl. This little blend is the foundation of your pancakes, ensuring the cocoa and leavening are evenly distributed for perfect texture and flavor every time.
Step 2: Whisk Together the Wet Ingredients
In a separate bowl, vigorously whisk the buttermilk, egg, vegetable oil, red food coloring, and vanilla extract. The buttermilk and egg bring moisture and richness, while the food coloring gives the pancakes their signature, beautiful red tone.
Step 3: Mix Wet and Dry Ingredients
Pour the wet ingredients into the dry and gently stir until just combined. Avoid overmixing here; small lumps are perfectly fine and help keep the pancakes tender and light instead of dense or rubbery.
Step 4: Heat and Grease the Skillet
Preheat your skillet or griddle over medium heat and lightly grease it with oil or butter. A properly heated surface ensures even cooking and that gorgeous golden edge on your pancakes.
Step 5: Pour and Shape Your Pancakes
Using a ladle or measuring cup, pour your batter onto the skillet to the size you prefer. The batter’s thickness makes it easy to control, and you’ll notice how the red color deepens as it cooks.
Step 6: Cook Until Bubbles Form, Then Flip
Watch for little bubbles forming on top of the pancakes and edges starting to set—this signals it’s time to flip. Cook the other side until it turns beautifully golden brown. The contrast of the red and golden hues is a delight to your eyes and palate alike.
Step 7: Serve and Enjoy the Bliss
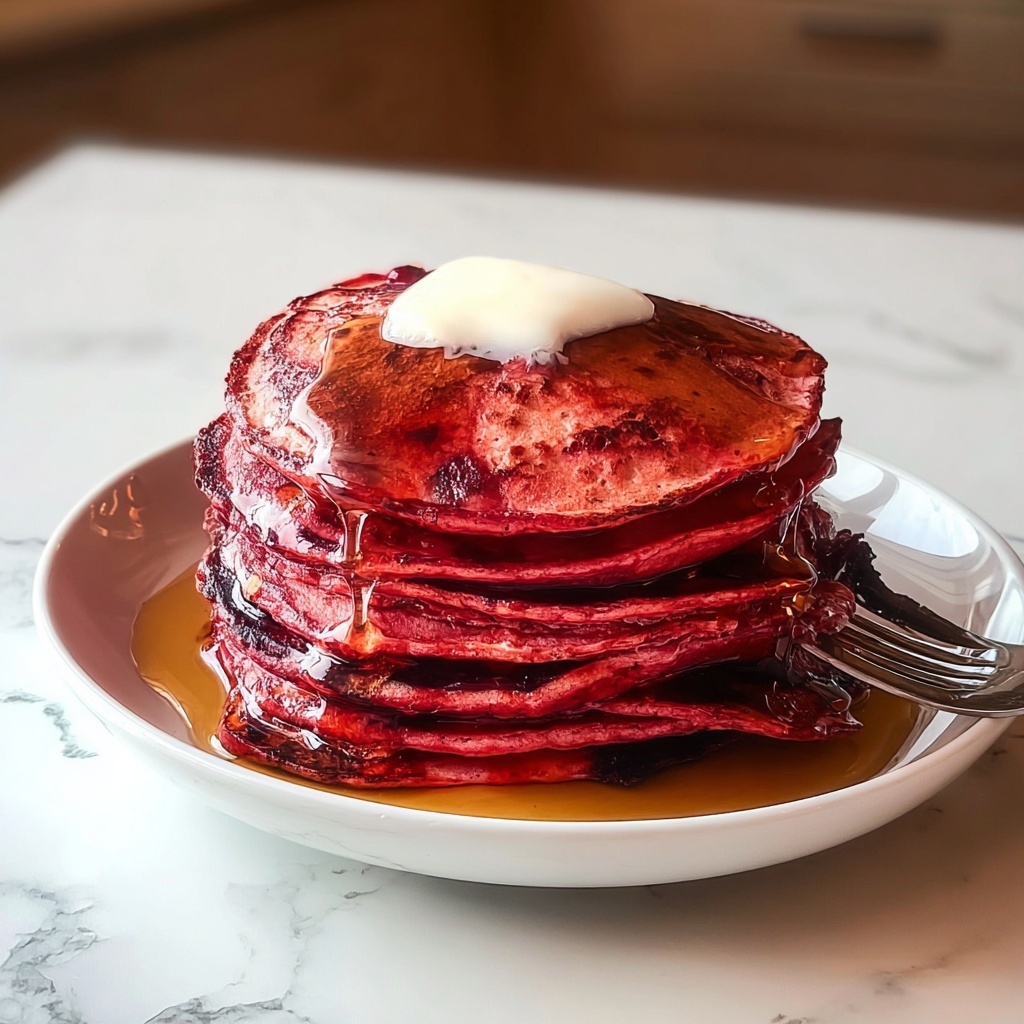
Once cooked, stack your pancakes high and get ready for that first bite! This step marks the joyful moment of indulging in your creation, whether topped with syrup, cream cheese frosting, or your favorite breakfast fixings.
How to Serve Red Velvet Pancakes: 7 Steps to Blissful Breakfast Delights Recipe
Garnishes
Elevate your Red Velvet Pancakes with a generous dollop of cream cheese frosting or a drizzle of maple syrup. Fresh berries, a sprinkle of powdered sugar, or a few chopped nuts add texture and a pop of freshness that complements the rich flavors.
Side Dishes
Pair these pancakes with crispy bacon or savory sausage for a classic breakfast harmony. Alternatively, a side of fresh fruit salad adds brightness and balances the indulgence, making your breakfast plate both satisfying and colorful.
Creative Ways to Present
For a stunning breakfast spread, layer the pancakes with alternating layers of frosting or whipped cream and fruit in a transparent dish for a red velvet pancake parfait. Or stack them high and insert a few skewers of fresh strawberries or blueberries sticking out for a playful tower that’s as fun to look at as it is to eat.
Make Ahead and Storage
Storing Leftovers
Any leftover pancakes can be stored in an airtight container in the refrigerator for up to 2 days. To keep them from drying out, place a damp paper towel between layers.
Freezing
These pancakes freeze beautifully! Lay them flat on a baking sheet, freeze until solid, then stack and store in a freezer bag. They will keep in the freezer for up to 2 months without losing that lovely texture.
Reheating
When craving pancakes later, reheat in the toaster or a warm oven until heated through and slightly crispy around the edges. This simple step brings them back to their fresh-from-the-griddle goodness.
FAQs
Can I make these pancakes without red food coloring?
Absolutely! While the red color is a fun and classic part of the dish, you can omit the food coloring and still enjoy a subtly chocolatey pancake that tastes just as amazing.
What can I use instead of buttermilk?
If you don’t have buttermilk on hand, a cup of milk mixed with one tablespoon of lemon juice or white vinegar works perfectly as a substitute to maintain the tangy tenderness.
Can I use whole wheat flour for a healthier option?
You can substitute whole wheat flour, but be aware the pancakes may turn out a bit denser and with a nuttier flavor. Mixing white and whole wheat flour can keep the texture lighter while adding nutrition.
Is it possible to make this recipe vegan?
Yes! Replace the egg with flaxseed or chia egg, use a plant-based milk and vinegar for buttermilk, and choose vegan-friendly oil. You’ll still find these pancakes delightfully tasty.
How thick should the batter be?
The batter should be thick but pourable—a consistency similar to traditional pancake batter. If it’s too thick, add a splash of milk; if too thin, sprinkle in a little more flour.
Final Thoughts
There is something so special about the Red Velvet Pancakes: 7 Steps to Blissful Breakfast Delights Recipe that makes every breakfast feel like a celebration. From the stunning color and flavor to the comforting fluffiness, this recipe is a pleasurable way to start your day or impress loved ones on a weekend brunch. Trust me, once you try them, these pancakes will become a cherished part of your breakfast rotation, filling your mornings with happiness and a little touch of magic.
Print
Red Velvet Pancakes: 7 Steps to Blissful Breakfast Delights Recipe
- Prep Time: 10 minutes
- Cook Time: 15 minutes
- Total Time: 25 minutes
- Yield: 4 servings (about 8 pancakes)
- Category: Breakfast
- Method: Stovetop
- Cuisine: American
Description
These Red Velvet Pancakes offer a vibrant twist on traditional pancakes, combining a hint of cocoa with striking red color for a festive and delicious breakfast treat. Soft and fluffy, they are perfect for a cozy morning or special occasion and can be served with syrup or cream cheese frosting for extra indulgence.
Ingredients
Dry Ingredients
- 1 cup all-purpose flour
- 1 tablespoon cocoa powder
- 1 tablespoon baking powder
- 1/2 teaspoon salt
Wet Ingredients
- 1 cup buttermilk
- 1 large egg
- 2 tablespoons vegetable oil
- 1 tablespoon red food coloring
- 1 teaspoon vanilla extract
Instructions
- Mix Dry Ingredients: In a medium bowl, whisk together the all-purpose flour, cocoa powder, baking powder, and salt until well combined to ensure even distribution of leavening and flavor components.
- Combine Wet Ingredients: In a separate bowl, whisk the buttermilk, large egg, vegetable oil, red food coloring, and vanilla extract until the mixture is smooth and the color is uniform.
- Blend Batter: Pour the wet ingredients into the dry ingredients and gently mix until just combined. Be careful not to overmix as this can make the pancakes tough; a few lumps are fine.
- Heat Skillet: Place a non-stick skillet or griddle over medium heat. Lightly grease the surface with oil or butter to prevent sticking and enhance browning.
- Cook Pancakes: Pour spoonfuls of batter onto the heated skillet, creating pancakes of your preferred size. Allow them to cook until bubbles form on the surface and the edges start to look set.
- Flip Pancakes: Carefully flip each pancake and cook the other side until golden brown, about 1-2 minutes more, ensuring they are cooked through and fluffy.
- Serve: Serve the red velvet pancakes warm with maple syrup, or for a richer treat, top with cream cheese frosting. Enjoy immediately for best texture and flavor.
Notes
- Do not overmix the batter to maintain fluffy pancakes.
- Adjust the amount of red food coloring for a deeper or lighter red hue.
- Butter can be used instead of vegetable oil for richer flavor.
- These pancakes pair perfectly with cream cheese frosting or classic maple syrup.
- Make sure the skillet is properly heated to avoid pancakes sticking or cooking unevenly.
