
If you’ve ever stared longingly at sushi rolls and wished you could just make them at home, you’re in for a treat. This How to Roll Sushi Recipe is the perfect gateway into creating your own vibrant and delicious sushi rolls right in your kitchen. With a handful of simple ingredients and a few easy steps, you’ll impress friends, satisfy cravings, and tap into the joy of handmade sushi. It’s not just about the flavors; it’s about the experience of rolling, crafting, and savoring something truly special.
Ingredients You’ll Need
Gathering the right ingredients is simpler than you might think, yet each one plays a crucial role in delivering authentic taste and texture. From the sticky sushi rice that binds everything together to the crisp nori sheet, every element contributes to the harmony of your sushi roll.
- 1 cup sushi rice: The foundation of the roll, perfectly sticky for easy rolling and great texture.
- 1 piece nori (roasted): Adds that classic seaweed flavor and keeps the roll intact.
- Toasted sesame seeds (black): For a nutty crunch and an eye-catching contrast on the outside.
- Filling ingredients: Choose fresh, colorful items like cucumber, avocado, or fresh fish to bring brightness and flavor.
How to Make How to Roll Sushi Recipe
Step 1: Prepare the Sushi Rice
Start by rinsing your sushi rice under cold water until it runs clear, then cook it according to package instructions. Once cooked, gently fold in a mix of rice vinegar, sugar, and salt to give it that signature slightly sweet and tangy flavor. Let it cool to room temperature—sticky but cool rice is your best friend here.
Step 2: Lay Out the Nori and Spread the Rice
Place your nori sheet shiny side down on a bamboo sushi mat or a clean surface. Using wet fingers, spread an even layer of your prepared sushi rice over the nori, leaving about an inch free at the top edge to seal the roll later. This step is all about even coverage and not packing the rice too thickly—balance is key.
Step 3: Add Your Filling
Lay your chosen fillings in a horizontal line across the rice near the edge closest to you. Be mindful not to overload the roll—just enough to create a satisfying bite without making rolling difficult. Freshness and contrast between crunchy and creamy elements elevate your sushi game.
Step 4: Roll It Up
Here’s where the fun really begins. Using your fingers or the bamboo mat, carefully lift the edge of the nori closest to you and begin rolling it over the filling, pressing gently to keep everything tight. Continue rolling until you reach the free edge of the nori, then moisten that edge slightly to seal your sushi roll shut. Practice makes perfect, so don’t worry if your first roll isn’t flawless.
Step 5: Slice and Garnish
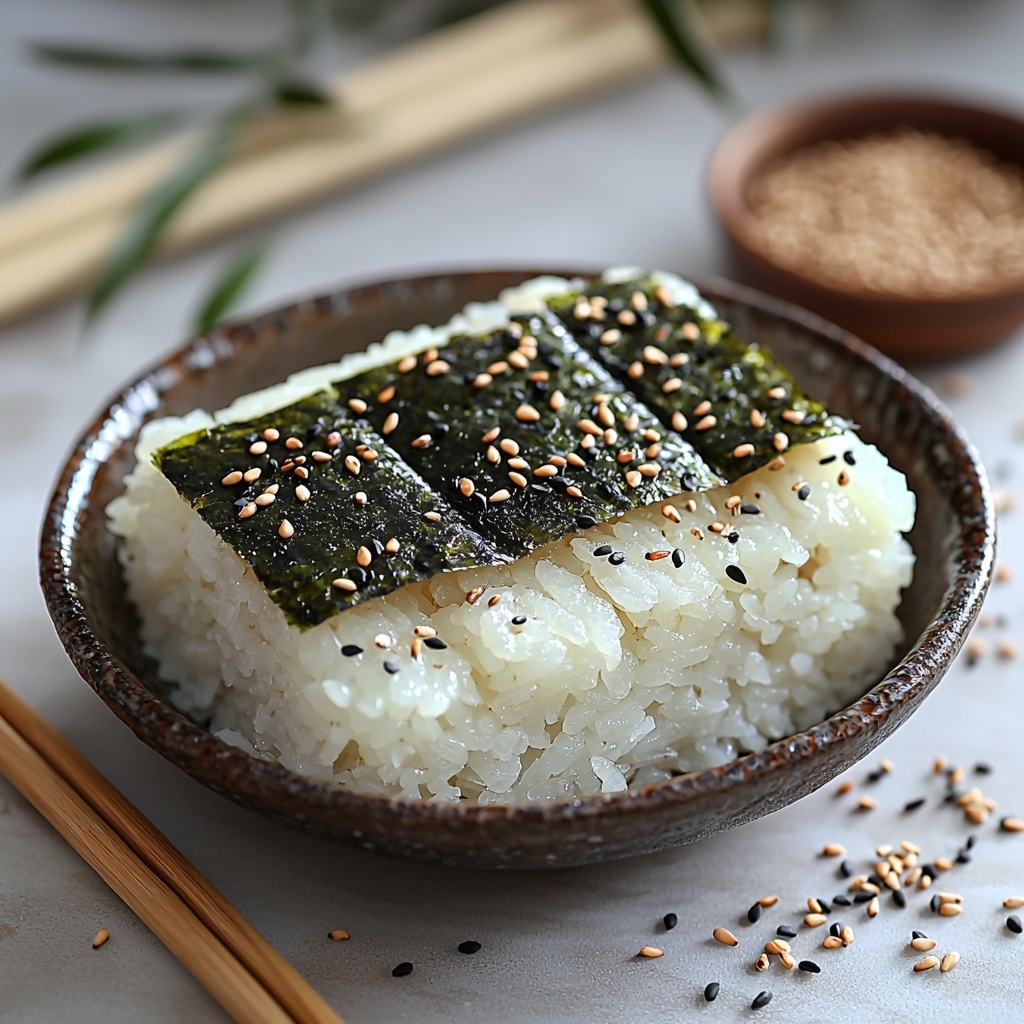
Using a sharp, damp knife, slice your roll into bite-sized pieces. Sprinkle toasted black sesame seeds on top for extra texture and a beautiful finish. Now your sushi is ready to be enjoyed or adorned with sauces and garnishes of your choice.
How to Serve How to Roll Sushi Recipe
Garnishes
Brighten your sushi rolls with pickled ginger, a dab of wasabi, or a drizzle of soy sauce. These garnishes not only add complementary flavors but also provide a sensory experience that feels traditional and exciting.
Side Dishes
Complement your sushi with light, fresh sides like a seaweed salad, miso soup, or edamame beans. These dishes balance out the meal and keep the focus on freshness and texture.
Creative Ways to Present
Try serving your sushi on a wooden board with bamboo leaves or create a colorful sushi platter for a party. Adding small bowls of dipping sauces and chopsticks invites your guests to dig in and appreciate the artistry behind your creation.
Make Ahead and Storage
Storing Leftovers
It’s best to enjoy your sushi rolls fresh, but if you have leftovers, store them in an airtight container in the refrigerator. Consume within 24 hours as the texture of the rice and nori changes quickly.
Freezing
Freezing sushi is not recommended since the rice tends to lose its texture and becomes mushy upon thawing, which diminishes the overall sushi experience.
Reheating
Reheating sushi is tricky because the rice will harden and the nori may become soggy. If necessary, allow the rolls to come to room temperature and avoid microwaving to preserve as much freshness as possible.
FAQs
What type of rice is best for sushi?
Sushi rice, a short-grain variety, is best because it has the perfect stickiness needed to hold the roll together while giving that chewy texture everyone loves.
Can I use regular seaweed instead of nori?
Nori is specifically made for sushi rolls and provides the ideal flavor and texture. Other seaweed types may be tougher or too wet, so it’s best to stick with roasted nori sheets.
How can I prevent my sushi from falling apart?
The secret lies in not overfilling the roll, spreading the rice evenly but not too thick, and rolling firmly with the bamboo mat to keep everything tight.
Are raw fish fillings safe to use at home?
If using raw fish, ensure you buy sashimi-grade fish from a trusted source and keep it properly refrigerated. Alternatively, use cooked or vegetarian fillings for peace of mind and delicious results.
Is a bamboo mat necessary for rolling sushi?
While a bamboo sushi mat makes rolling easier and more consistent, you can roll sushi by hand if you practice. The mat is highly recommended for beginners.
Final Thoughts
Rolling sushi at home doesn’t have to feel intimidating. This How to Roll Sushi Recipe breaks it down into simple steps that anyone can follow and enjoy. Whether you’re making a quick snack or treating friends to a sushi night, these homemade rolls will bring smiles and full bellies. So grab your ingredients, roll up your sleeves, and start creating sushi magic in your own kitchen!
Print
How to Roll Sushi Recipe
- Prep Time: 10 minutes
- Cook Time: 15 minutes (rice cooking time)
- Total Time: 25 minutes
- Yield: 1 roll
- Category: Main Dish
- Method: No-Cook
- Cuisine: Japanese
Description
Learn how to roll a classic sushi roll at home with simple ingredients and easy steps. This guide covers preparing sushi rice, assembling the nori sheet, adding fillings, and rolling the sushi tightly to create a delicious and visually appealing roll perfect for sushi lovers.
Ingredients
Sushi Rice
- 1 cup sushi rice
- Water (for cooking rice)
- 2 tablespoons rice vinegar
- 1 tablespoon sugar
- 1 teaspoon salt
Nori and Garnishes
- 1 piece nori (roasted seaweed sheet)
- Toasted black sesame seeds
Filling Ingredients
- Sliced cucumber
- Sliced avocado
- Fresh fish or cooked seafood (e.g., tuna, salmon, crab meat)
- Optional: Cream cheese or mayonnaise
Instructions
- Prepare Sushi Rice: Rinse 1 cup sushi rice under cold water until the water runs clear. Cook it according to package instructions. Once cooked, transfer the hot rice to a large bowl and gently fold in a mixture of 2 tbsp rice vinegar, 1 tbsp sugar, and 1 tsp salt while fanning the rice to cool it quickly and achieve the perfect sushi rice texture.
- Prepare the Nori Sheet: Place one roasted nori sheet on a bamboo sushi mat or flat surface, shiny side down. Evenly sprinkle toasted black sesame seeds on the nori for added flavor and texture.
- Assemble the Sushi Roll: With wet hands, spread a thin, even layer of sushi rice over the nori, leaving about 1 inch at the top edge free of rice to seal the roll. Arrange your desired fillings (such as cucumber, avocado, and fish) in a line across the rice near the bottom edge. Use the bamboo mat to gently lift and roll the sushi tightly over the filling. Seal the edge with a little water and press to close the roll.
Notes
- Keep your hands moist while handling sushi rice to prevent sticking.
- Use sushi-grade fish for safety and best flavor.
- Adjust fillings according to personal preference or dietary restrictions.
- Slice the rolled sushi with a sharp, wet knife for clean cuts.


