
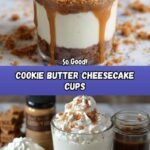
If you adore rich, creamy desserts that combine a bit of crunch with a luscious twist, this Cookie Butter Cheesecake Cups Recipe is an absolute treasure you’ll want to keep close. Picture velvety cheesecake nestled on a bed of buttery cookie crumbs, topped with a dreamy layer of sweet cookie butter and a dollop of whipped cream that melts in your mouth. This dessert not only dazzles the taste buds but also offers an irresistibly charming presentation, making it perfect for impressing guests or simply treating yourself on any occasion.
Ingredients You’ll Need
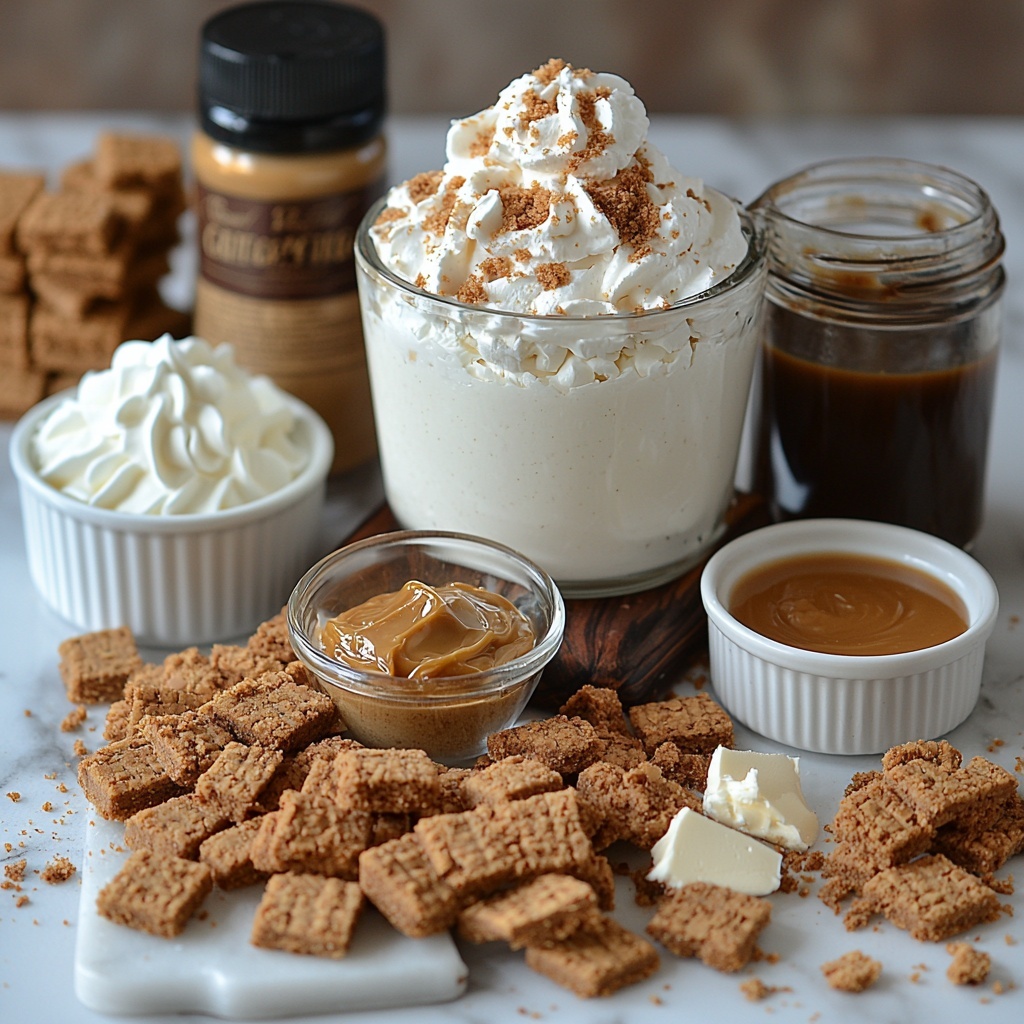
These ingredients might be simple, but each plays a starring role in delivering mouthwatering taste and perfectly balanced texture. From the buttery cookie base that provides a satisfying crunch, to the whipped topping that adds an airy lightness, this recipe is a harmony of flavors and textures.
- 1 cup crushed Biscoff cookies or graham crackers: Forms the crunchy, flavorful crust that’s the foundation of these cups.
- 4 tablespoons melted butter: Binds the cookie crumbs together for that perfect crust texture.
- 8 ounces cream cheese, softened: Gives the cheesecake its signature creamy richness.
- 1/2 cup powdered sugar: Adds just the right touch of sweetness to the cheesecake layer.
- 1 teaspoon vanilla extract: Infuses subtle warmth and depth to the cheesecake filling.
- 1 cup whipped topping: Lightens up the filling, making it fluffy and dreamy.
- 1/2 cup cookie butter, warmed: The star ingredient that ties everything together with its spiced caramel flavor and spreadable texture.
- Whipped cream, for topping: Adds an extra layer of creamy indulgence and visual appeal.
- Caramel sauce, for drizzling (optional): Enhances sweetness and adds a beautiful glossy finish.
- Extra cookie crumbs and cookie pieces, for garnish: Adds texture and a hint of rustic charm to each serving.
How to Make Cookie Butter Cheesecake Cups Recipe
Step 1: Prepare the Crust
Begin by crushing your Biscoff cookies or graham crackers until they’re fine crumbs. You can use a food processor for speed or a rolling pin and a zip-top bag for a bit of arm exercise. This forms the base that carries all the flavors with a wonderful buttery crunch.
Step 2: Combine Crumbs with Butter
Mix the cookie crumbs thoroughly with melted butter until the mixture feels like wet sand. This texture ensures that the crust will hold together perfectly in each cup, giving you that satisfying bite every time.
Step 3: Form the Crust Cups
Press the crumb mixture firmly into the bottom of each individual dessert cup. Use the back of a spoon or your fingers to create a solid, even layer that will serve as the delightful foundation for your cheesecake filling.
Step 4: Make the Cheesecake Filling
In a mixing bowl, beat the softened cream cheese until perfectly smooth and creamy. This step is key for that velvety texture that defines great cheesecake.
Step 5: Sweeten and Flavor
Add the powdered sugar and vanilla extract to your cream cheese and mix until everything is fully combined into a silky, sweet base that’s bursting with inviting aroma.
Step 6: Fold in the Whipped Topping
Gently fold in the whipped topping with a spatula, careful to keep your mixture light and fluffy. This airiness will make your cheesecake cups feel light as a cloud instead of dense and heavy.
Step 7: Build the Cups
Spoon or pipe the cheesecake mixture carefully over the cookie crust in each cup. Take your time here to keep things neat and visually appealing, because presentation matters when sharing this delightful treat.
Step 8: Add the Cookie Butter Layer
Warm the cookie butter for 15 to 20 seconds in the microwave to make it silky and easy to drizzle. Spoon or drizzle this luscious layer over the cheesecake filling, adding that signature, irresistible flavor that makes this recipe so special.
Step 9: Top with Whipped Cream and Garnishes
Add a generous swirl of whipped cream atop each cup. Then, if you like, drizzle with caramel sauce for extra sweetness and texture, and sprinkle extra cookie crumbs and cookie pieces for a charming, rustic look.
Step 10: Chill and Set
Place your completed Cookie Butter Cheesecake Cups into the refrigerator for at least two hours. This chilling time allows the flavors to meld and the cheesecake filling to set to that perfect creamy consistency.
How to Serve Cookie Butter Cheesecake Cups Recipe
Garnishes
Enhance your presentation with a few creative touches. Fresh whipped cream dollops, a sprinkle of crushed cookies, and a light drizzle of caramel sauce not only look stunning but add layers of flavor and texture that excite the palate at first sight.
Side Dishes
If you want to turn these cheesecake cups into a full dessert event, consider pairing them with fresh berries or a tangy fruit compote. The fruity acidity cuts through the sweetness and richness, balancing the flavors beautifully.
Creative Ways to Present
Serving these in clear glass cups or mason jars lets everyone admire the gorgeous layers. You could also garnish with a small cinnamon stick or a thin slice of apple for an elegant, seasonal twist. Don’t be afraid to get playful and make these cups your own!
Make Ahead and Storage
Storing Leftovers
Keep any leftover Cookie Butter Cheesecake Cups refrigerated in an airtight container. They’ll stay fresh and delicious for up to three days, making them ideal for preparing in advance or enjoying over several days.
Freezing
If you want to save some for later, these cups freeze well. Wrap them tightly or use airtight containers to prevent freezer burn. When frozen, they’ll keep their creamy texture for up to two months.
Reheating
Because these are best served chilled, reheating isn’t necessary. Just thaw frozen cups overnight in the refrigerator and enjoy the same luscious texture each time.
FAQs
Can I use a different type of cookie for the crust?
Absolutely! While Biscoff cookies add a unique caramelized spice, graham crackers or even chocolate cookies can be delicious substitutes. Each choice will bring its own delightful flavor twist to the cups.
Is it necessary to warm the cookie butter before drizzling?
Warming the cookie butter makes it easier to drizzle smoothly over the cheesecake layer, creating a beautiful finish. If you skip warming, it may be thicker and harder to spread evenly.
Can I make this dessert vegan or dairy-free?
Yes, with some adjustments! Use dairy-free cream cheese and whipped topping alternatives, and ensure your cookie crumbs are plant-based. Cookie butter is typically vegan-friendly, but check labels just to be sure.
How long should I let the cheesecake cups chill?
A minimum of two hours in the refrigerator is necessary to let the cheesecake layer set properly and for the flavors to develop. For best results, chilling overnight works beautifully too.
Can I prepare these for a party ahead of time?
Definitely! Cookie Butter Cheesecake Cups Recipe is perfect for make-ahead desserts. Prepare everything a day before, chill overnight, and garnish just before serving to keep everything fresh and picture-perfect.
Final Thoughts
There’s something truly magical about these Cookie Butter Cheesecake Cups Recipe that makes every bite feel like a celebration of flavor and texture. Whether you’re a cheesecake fanatic or simply love new takes on classic desserts, this recipe offers that perfect blend of ease, elegance, and indulgence. Give it a try—you’ll end up with a new favorite to share and savor time and time again!
Print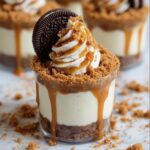
Cookie Butter Cheesecake Cups Recipe
- Prep Time: 15 minutes
- Cook Time: 0 minutes
- Total Time: 2 hours 15 minutes
- Yield: 6 to 8 cups
- Category: Dessert
- Method: No-Cook
- Cuisine: American
- Diet: Vegetarian
Description
These Cookie Butter Cheesecake Cups are delightful individual desserts featuring a crunchy Biscoff cookie crust, creamy cheesecake filling enhanced with cookie butter, and topped with whipped cream and optional caramel drizzle. Perfect for a quick yet elegant treat that requires no baking, just chilling.
Ingredients
Crust
- 1 cup crushed Biscoff cookies or graham crackers
- 4 tablespoons melted butter
Cheesecake Filling
- 8 ounces cream cheese, softened
- 1/2 cup powdered sugar
- 1 teaspoon vanilla extract
- 1 cup whipped topping
Toppings
- 1/2 cup cookie butter, warmed
- Whipped cream, for topping
- Caramel sauce, for drizzling (optional)
- Extra cookie crumbs and cookie pieces, for garnish
Instructions
- Prepare the crust: Crush the cookies into fine crumbs using a food processor or by placing them in a zip-top bag and crushing with a rolling pin until fine.
- Mix crust ingredients: Combine the crushed cookie crumbs with the melted butter until the mixture resembles wet sand in texture.
- Form crust base: Press the crumb mixture firmly into the bottoms of individual dessert cups to create the crust layer.
- Beat cream cheese: In a medium bowl, beat the softened cream cheese until smooth and creamy using a hand mixer or stand mixer.
- Add sugar and vanilla: Mix in the powdered sugar and vanilla extract until fully combined and smooth.
- Fold in whipped topping: Gently fold the whipped topping into the cream cheese mixture until light and fluffy, being careful not to deflate the mixture.
- Assemble cheesecake layer: Spoon or pipe the cheesecake filling over each crust layer in the cups, smoothing the tops.
- Warm and add cookie butter: Warm the cookie butter in the microwave for 15–20 seconds until pourable, then drizzle or spoon it evenly over the cheesecake layer.
- Add final toppings: Top each cup with whipped cream, an optional drizzle of caramel sauce, and garnish with extra cookie crumbs and a cookie piece.
- Chill and set: Refrigerate the assembled cheesecake cups for at least 2 hours to allow the dessert to firm up before serving.
Notes
- Ensure the cream cheese is fully softened at room temperature for best mixing results.
- Use either Biscoff cookies or graham crackers based on preference; Biscoff adds extra spice and caramel notes.
- For a dairy-free version, substitute cream cheese and whipped topping with suitable plant-based alternatives.
- These cheesecake cups can be prepared a day ahead and stored covered in the refrigerator.
- Chilling time is essential for proper texture, so do not skip or shorten the refrigeration step.

