
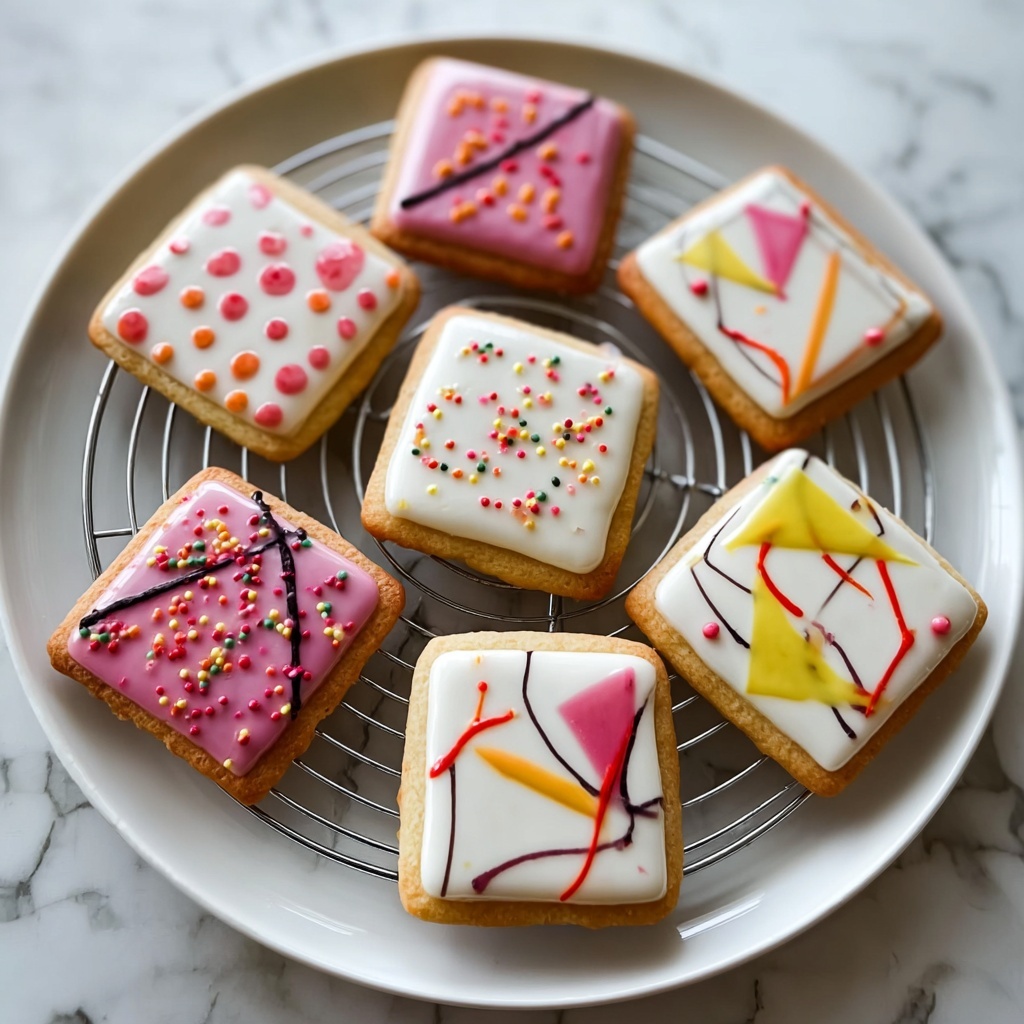
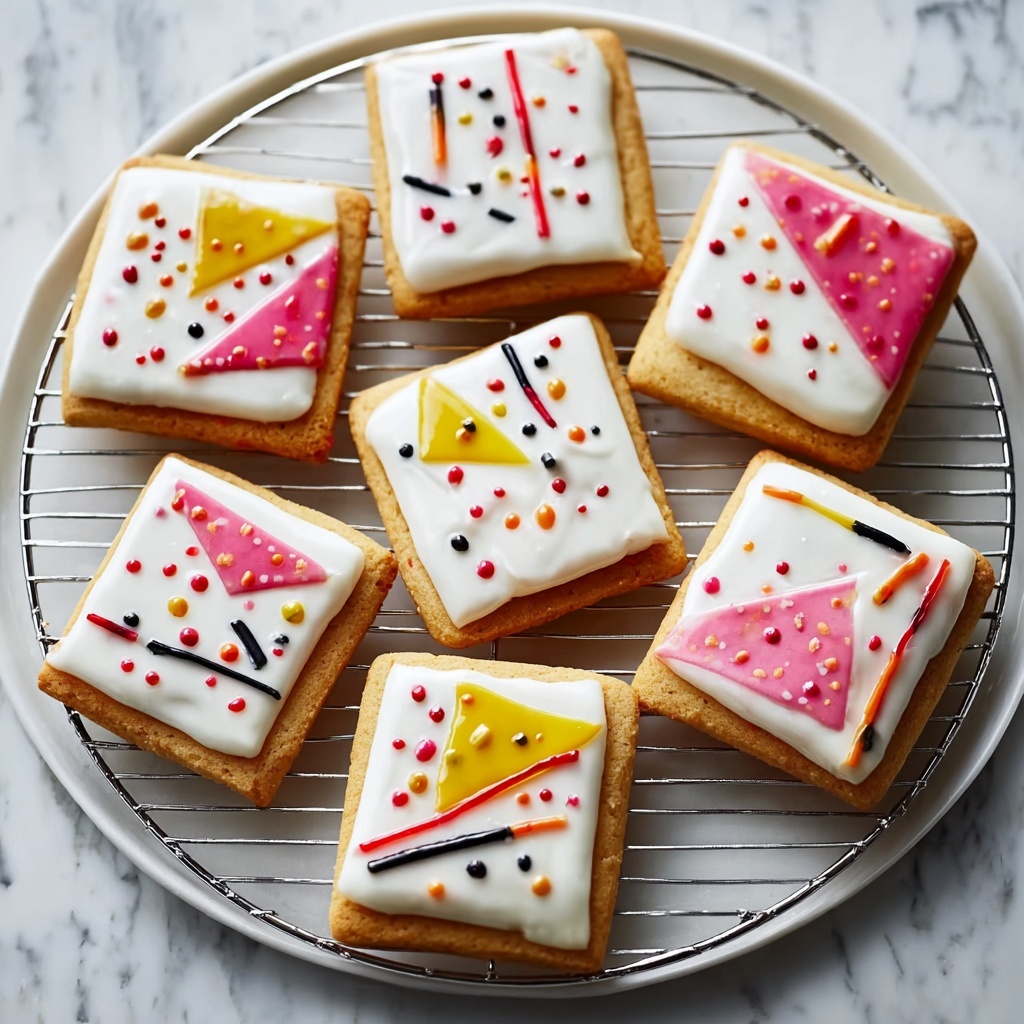
If you adore cookies that look as delightful as they taste, you are going to love this Abstract Art Cookies Recipe. These cookies are a playful canvas of colorful chocolate candies embedded in a buttery, chewy base, creating a fun and vibrant treat every time you bite into one. Whether you’re baking for a crowd or craving a creative sweet snack, this recipe brings joy with every batch and lets your imagination run wild in the kitchen.
Ingredients You’ll Need
You’ll find that the ingredients for this Abstract Art Cookies Recipe are refreshingly simple but each plays a crucial role in creating the perfect texture, flavor, and vibrant look. From the rich butter to the burst of colorful chocolate candies, every component is essential.
- All-purpose flour: The sturdy foundation for cookies, giving them structure and the right chewy texture.
- Baking soda: Helps the cookies rise just enough without compromising their density.
- Salt: Balances sweetness and enhances the depth of flavors.
- Unsalted butter: Provides richness and a tender crumb; make sure it’s softened for easier mixing.
- Granulated sugar: Sweetens while contributing a bit of crispness on the edges.
- Brown sugar: Adds moisture and a subtle caramel note that complements the colorful candies.
- Vanilla extract: Infuses warmth and enhances the overall flavor.
- Large eggs: Bind the ingredients and add tenderness.
- Colorful chocolate candies: The star of the show, these add fun pops of color and melty chocolate surprises.
How to Make Abstract Art Cookies Recipe
Step 1: Preheat and Prepare
Start by preheating your oven to 375°F (190°C). This ensures that the cookies begin baking at the perfect temperature the moment they hit the rack, helping them bake evenly and develop golden edges.
Step 2: Mix Dry Ingredients
In a separate bowl, whisk together the all-purpose flour, baking soda, and salt. Combining these ingredients first prevents uneven distribution and ensures every bite has just the right lift and flavor balance.
Step 3: Cream Butter and Sugars
In a large mixing bowl, beat the softened butter together with granulated sugar, brown sugar, and vanilla extract until the mixture is creamy and smooth. This step aerates the dough, giving the cookies a light and tender texture.
Step 4: Add Eggs One at a Time
Beat in the eggs one by one, making sure each is fully incorporated before adding the next. This helps maintain a smooth batter and prevents curdling, laying the groundwork for perfectly tender cookies.
Step 5: Combine Wet and Dry Ingredients
Slowly add the dry flour mixture to the wet ingredients, mixing gently. Overmixing at this stage could make your cookies tough, so mix just until you see the flour disappear.
Step 6: Fold in Colorful Chocolate Candies
Gently fold the colorful chocolate candies into your dough. These candies are the “abstract art” of the recipe, creating bursts of color and a melty chocolate surprise in each bite.
Step 7: Scoop and Bake
Drop rounded tablespoons of dough onto ungreased baking sheets, spacing them evenly to give the cookies room to spread. Pop them into the oven and bake for 9 to 11 minutes, until the edges are lightly golden but the centers remain soft.
Step 8: Cool Before Enjoying
Let your freshly baked Abstract Art Cookies sit on the baking sheets for a few minutes before transferring them to wire racks. This helps them set up perfectly without breaking apart, keeping that delightful chewy texture intact.
How to Serve Abstract Art Cookies Recipe
Garnishes
While these cookies are charming on their own, you can add a sprinkle of sea salt or a light dusting of powdered sugar for some extra flair that enhances both sweetness and depth.
Side Dishes
Pair your Abstract Art Cookies with a cold glass of milk or a warm mug of tea or coffee. The creamy beverage perfectly complements the gooey chocolate candies and buttery cookie base, making every bite feel cozy and indulgent.
Creative Ways to Present
For parties or gifting, arrange the cookies artfully on a colorful platter or wrap them in clear cellophane tied with a bright ribbon. You could even stack a few layers separated by parchment paper to present a playful “abstract art” tower of yumminess!
Make Ahead and Storage
Storing Leftovers
Your Abstract Art Cookies will stay fresh and chewy in an airtight container at room temperature for up to a week. Keeping them sealed helps maintain their softness and ensures the colorful candies don’t lose their charm.
Freezing
If you want to save some for later, freeze the dough in scooped portions on a baking sheet, then transfer to a freezer bag. When ready, bake directly from frozen, adding a couple of extra minutes to the baking time for perfect cookies anytime.
Reheating
To enjoy your cookies warm, pop them in the microwave for 10 to 15 seconds or briefly in a low oven. This revives the melty chocolate candies and softens the cookie, bringing back that fresh-baked magic sensation.
FAQs
Can I substitute the chocolate candies with something else?
Absolutely! You can swap the candies for chocolate chips, nuts, or even dried fruit. Just keep in mind the texture and moisture balance to keep the cookie’s softness intact.
What makes these cookies “abstract art”?
The colorful chocolate candies scattered throughout give each cookie a unique, artistic look reminiscent of abstract paintings. No two cookies are quite the same, making them fun and visually stunning.
Can I make this recipe vegan?
Yes, you can try replacing the butter with a plant-based alternative and using flax eggs or other egg substitutes. The texture will be slightly different but still delicious.
Is it necessary to use both brown and granulated sugar?
Brown sugar adds moisture and a rich caramel flavor, while granulated sugar contributes to the crisp edges. Using both balances chewiness and texture perfectly.
How thick should I drop the dough on the baking sheet?
Using rounded tablespoons ensures cookies bake evenly and have a nice thickness. Too small, and they might overbake; too large, and they may stay undercooked in the center.
Final Thoughts
There’s something so joyful about making and sharing the Abstract Art Cookies Recipe. It’s a simple way to add color and fun to your baking routine while delivering a delicious treat everyone will adore. Give this recipe a try and watch how these vibrant, chewy cookies bring smiles to your kitchen and beyond!
Print
Abstract Art Cookies Recipe
- Prep Time: 15 minutes
- Cook Time: 11 minutes
- Total Time: 26 minutes
- Yield: 24 servings
- Category: Dessert
- Method: Baking
- Cuisine: American
Description
These Abstract Art Cookies are a colorful and fun twist on classic chocolate chip cookies. Packed with vibrant chocolate candies, they offer a delightful crunch and a visually appealing treat perfect for parties or everyday snacking. Made with a simple dough combining butter, sugars, vanilla, and eggs, these cookies bake to golden perfection with a chewy center and crispy edges.
Ingredients
Dry Ingredients
- 2 1/4 cups all-purpose flour
- 1 teaspoon baking soda
- 1/2 teaspoon salt
Wet Ingredients
- 1 cup unsalted butter, softened
- 3/4 cup granulated sugar
- 3/4 cup packed brown sugar
- 1 teaspoon vanilla extract
- 2 large eggs
Add-ins
- 1 cup colorful chocolate candies
Instructions
- Preheat the Oven: Set your oven to 375°F (190°C) to prepare for baking the cookies.
- Combine Dry Ingredients: In a medium bowl, whisk together the all-purpose flour, baking soda, and salt until well mixed.
- Cream Butter and Sugars: In a separate large bowl, use a mixer to cream the softened unsalted butter with granulated sugar, brown sugar, and vanilla extract until the mixture is smooth and fluffy.
- Add Eggs: Beat in the two eggs one at a time, ensuring each egg is fully incorporated before adding the next to create a smooth dough base.
- Mix in Dry Ingredients: Gradually add the flour mixture to the wet ingredients, mixing on low speed until just combined to avoid overworking the dough.
- Fold in Colorful Candies: Gently fold in the colorful chocolate candies evenly throughout the dough without crushing them.
- Form Cookies: Drop rounded tablespoons of dough onto ungreased baking sheets, spacing them adequately to allow for spreading during baking.
- Bake Cookies: Place the baking sheets in the preheated oven and bake for 9 to 11 minutes, or until edges are lightly golden but centers remain soft.
- Cool Cookies: Let the cookies cool on the baking sheets for a few minutes to set, then transfer them to wire racks to cool completely for the best texture.
Notes
- Ensure butter is softened to room temperature for easier creaming and better texture.
- Do not overmix the dough after adding flour to avoid tough cookies.
- Use colorful chocolate candies to add visual interest and a sweet crunch.
- Cookies may spread; space dough balls at least 2 inches apart on the baking sheet.
- For a crisper cookie, bake a minute or two longer; for softer cookies, reduce baking time slightly.


