If you are craving a rich, creamy treat that comes together in no time and will satisfy both peanut butter lovers and fudge fans alike, then you have found your new favorite. This Easiest Peanut Butter Fudge Recipe is exactly what you need to make indulgence feel effortless. With simple pantry staples and minimal fuss, it delivers a luscious texture and deeply satisfying peanut butter flavor that feels homemade and heartwarming. I can promise you that once you try this delicious fudge, it will become a go-to recipe for sharing joy with friends and family.
Ingredients You’ll Need
These ingredients are the heart and soul of this recipe, each playing a crucial role in creating that perfect fudge consistency and flavor. They are straightforward but indispensable, making this one of the easiest fudge recipes out there, without sacrificing any of the rich taste and creamy texture you expect.
- Sugar: The foundation for sweetness and structure, sugar caramelizes slightly to give the fudge a satisfying bite.
- Milk: Brings moisture and creaminess, helping the sugar dissolve evenly for a smooth finish.
- Peanut butter: The star ingredient, choose extra crunchy for texture or smooth for that classic melt-in-your-mouth feel.
- Vanilla extract: Adds warmth and complexity, rounding out the candy’s flavor beautifully.
How to Make Easiest Peanut Butter Fudge Recipe
Step 1: Combine sugar and milk
Begin by adding the sugar and milk to a medium saucepan over medium heat. Stir them constantly as the mixture heats up, making sure the sugar doesn’t stick to the pan or burn. This slow dissolution is key to achieving the luscious, velvety fudge texture everyone loves.
Step 2: Boil to dissolve sugar
Once the sugar and milk reach a boil, allow them to bubble gently for about 3 minutes. This brief boil ensures the sugar fully dissolves, eliminating any gritty texture and giving the fudge a silky smooth base.
Step 3: Stir in peanut butter and vanilla
Remove the saucepan from the heat and immediately add in your peanut butter and vanilla extract. Stir vigorously until the peanut butter melts into the sugary milk mixture, transforming it into a creamy, dreamy fudge batter that sings with peanut flavor.
Step 4: Pour and set
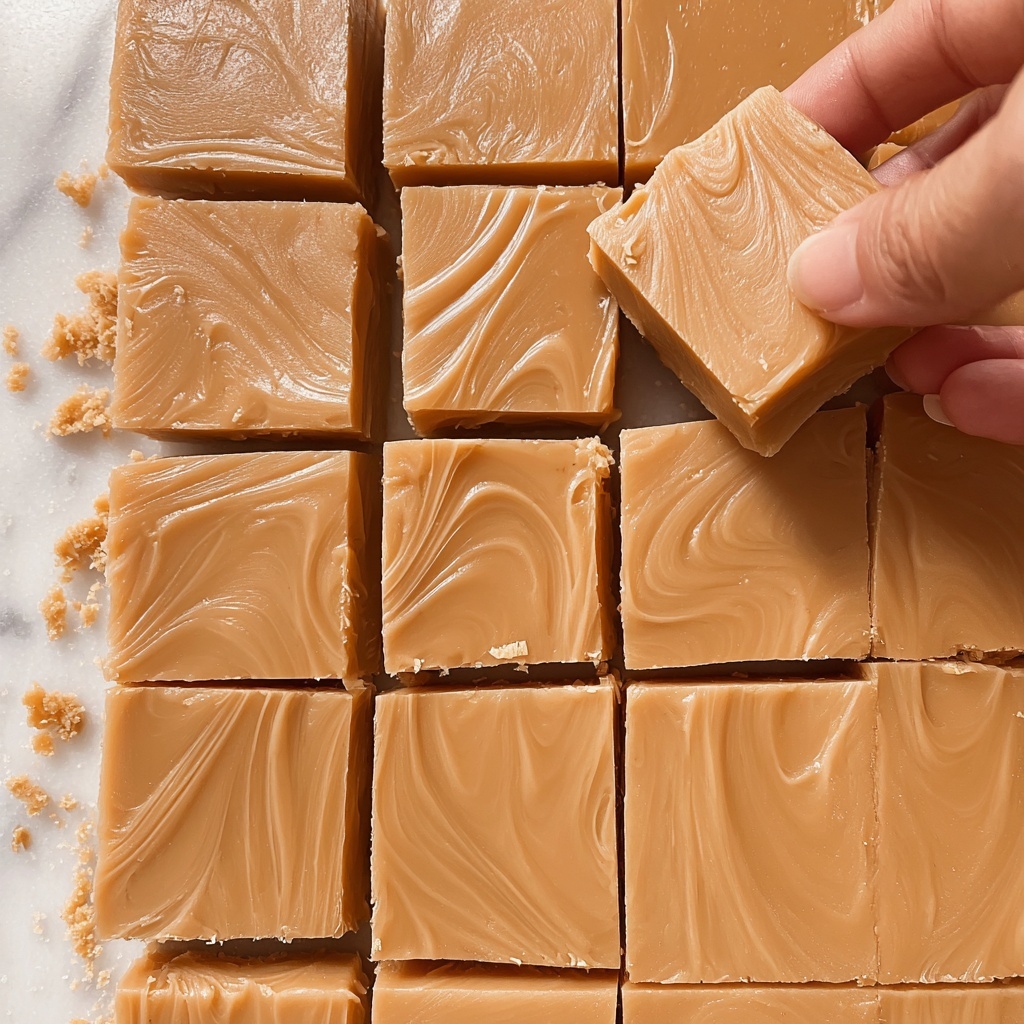
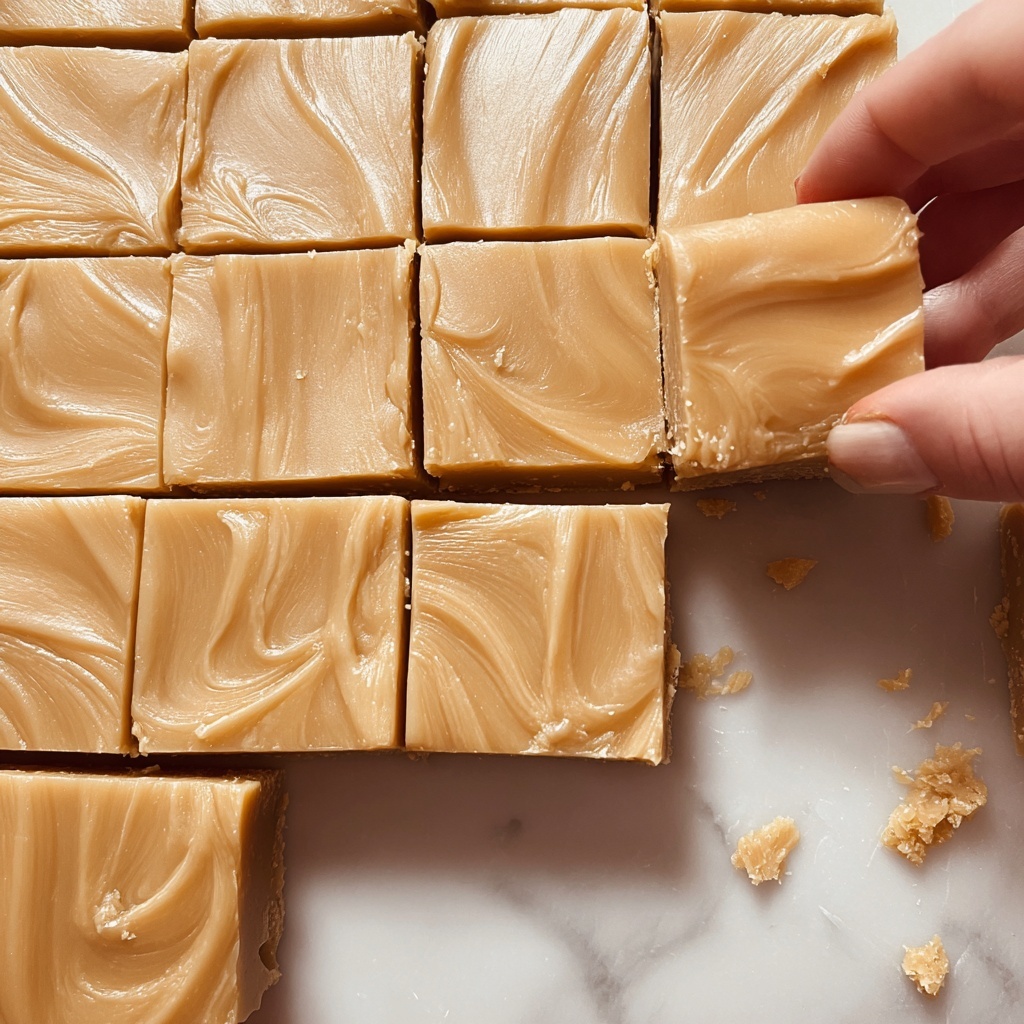
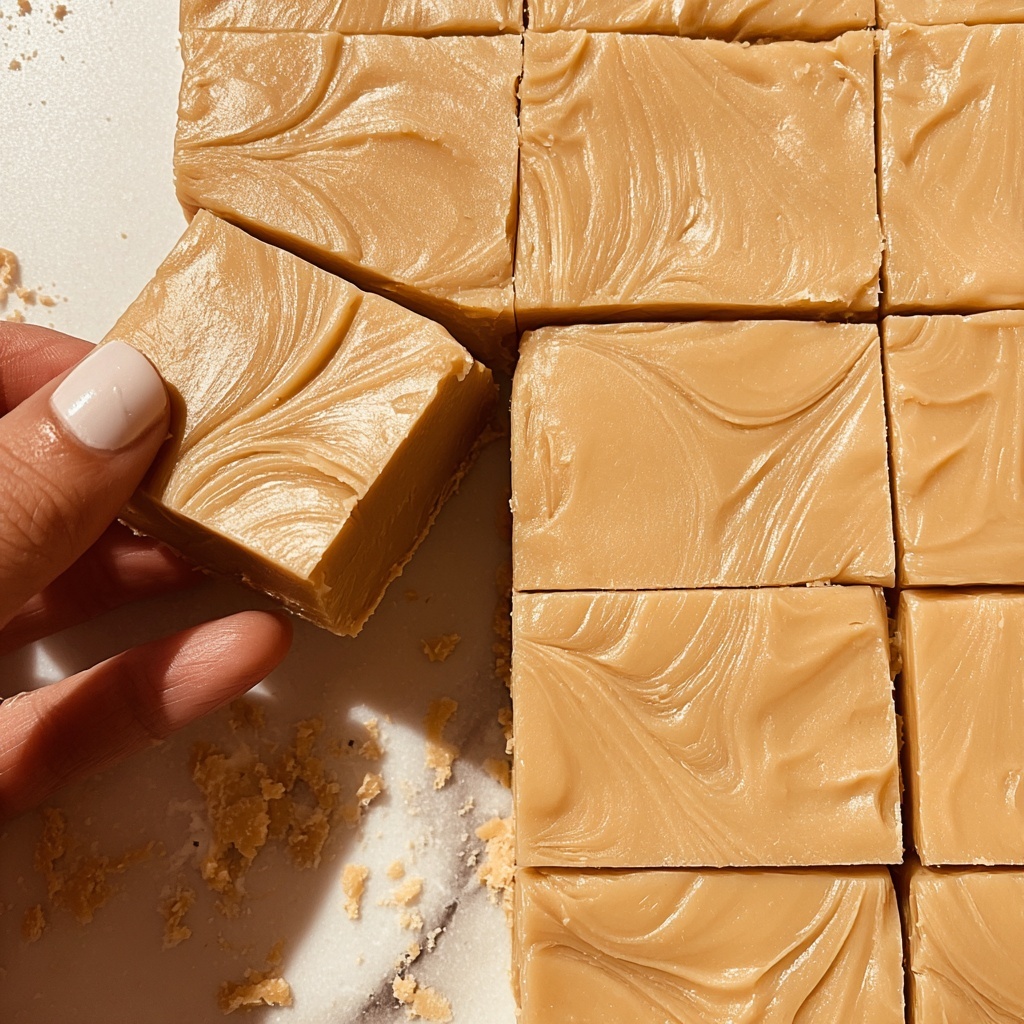
Line an 8×8-inch pan with parchment paper, then pour the fudge mixture in. Spread it evenly and let it cool at room temperature — patience here means the difference between fudge that slices beautifully or crumbles. Once fully set, cut into squares and prepare for compliments.
How to Serve Easiest Peanut Butter Fudge Recipe
Garnishes
To elevate the fudge visually and add an extra layer of flavor, sprinkle chopped peanuts or a light dusting of cocoa powder on top. A drizzle of melted chocolate or sea salt flakes adds a mouthwatering contrast that makes each bite even more irresistible.
Side Dishes
This fudge pairs wonderfully with a hot cup of coffee or rich dark chocolate ganache to balance the sweetness. For a fun snack board, serve alongside fresh fruit slices or crispy pretzels to combine salty, sweet, and fresh textures.
Creative Ways to Present
Try cutting the fudge into bite-sized cubes and threading them onto wooden skewers with mini marshmallows and berries. Alternatively, wrap individual squares in colorful wax paper tied with twine — perfect for party favors or thoughtful homemade gifts.
Make Ahead and Storage
Storing Leftovers
Once your fudge squares have cooled and set, keep them stored in an airtight container at room temperature. This will maintain their creamy texture and prevent them from drying out. They should stay deliciously fresh for up to two weeks, giving you plenty of time to savor or share.
Freezing
If you want to make this fudge ahead of time, freezing is an excellent option. Wrap each piece tightly in plastic wrap and store them in a freezer-safe container or zip bag. When properly frozen, your fudge will keep beautifully for up to three months, ready to thaw when a peanut butter craving strikes.
Reheating
While fudge is usually enjoyed cold or at room temperature, if you prefer it soft and melty, pop a square into the microwave for about 10 seconds. This quick warm-up brings out that gooey peanut butter goodness perfectly without compromising texture.
FAQs
Can I use natural peanut butter in this recipe?
Absolutely! Natural peanut butter works well, but because it has a thinner consistency and contains less sugar than processed versions, it might make the fudge slightly softer. Just be sure to stir extra well for the smoothest result.
Is it possible to make this fudge without dairy?
Yes, you can swap the milk for a plant-based alternative like almond or oat milk. Keep in mind that non-dairy milks may slightly alter the final texture, but the fudge will still be creamy and delicious.
How do I prevent the fudge from becoming grainy?
Ensuring the sugar fully dissolves by boiling the sugar and milk mixture for the full 3 minutes is crucial in avoiding graininess. Consistent stirring and careful temperature control during boiling keep the fudge creamy.
Can I add chocolate to the peanut butter fudge?
Definitely! Adding melted chocolate or cocoa powder can create a peanut butter chocolate fudge variation. Mix it in after removing from heat for a rich twist on the classic.
What’s the best way to cut the fudge?
Use a sharp knife and cut the fudge once it’s fully set at room temperature. Wiping the knife blade clean between cuts helps create neat, even squares without sticking.
Final Thoughts
This Easiest Peanut Butter Fudge Recipe is a delightful, simple way to enjoy a timeless treat with minimal effort and incredible flavor. Whether you’re a seasoned baker or just looking for a quick homemade indulgence, this fudge will quickly become your favorite sweet fix. Don’t hesitate — dive in, make a batch, and share the joy!
Print
Easiest Peanut Butter Fudge Recipe
- Prep Time: 5 minutes
- Cook Time: 10 minutes
- Total Time: 1 hour 15 minutes (includes cooling time)
- Yield: 16 servings
- Category: Dessert
- Method: Stovetop
- Cuisine: American
Description
This Easiest Peanut Butter Fudge recipe is a quick and simple treat that requires just a few ingredients and minimal cooking. Perfect for peanut butter lovers, this creamy fudge combines sugar, milk, peanut butter, and vanilla to create a rich and delicious dessert that sets to a perfect consistency without baking. Ideal for holidays, gifts, or whenever you crave a sweet peanut butter delight.
Ingredients
Ingredients
- 2 cups sugar
- 1/2 cup milk
- 1 cup peanut butter (extra crunchy or smooth, as desired)
- 1 teaspoon vanilla extract
Instructions
- Combine sugar and milk: In a medium saucepan, combine the sugar and milk. Bring to a boil over medium heat, stirring constantly to prevent the sugar from burning or sticking to the pan.
- Boil mixture: Let the mixture boil for about 3 minutes, ensuring the sugar is fully dissolved. This step is crucial to achieve a smooth fudge texture without graininess.
- Add peanut butter and vanilla: Remove the pan from heat and stir in the peanut butter and vanilla extract thoroughly until the fudge is creamy and smooth.
- Set the fudge: Pour the mixture into an 8×8-inch pan lined with parchment paper. Allow it to cool at room temperature until completely set, then cut into squares to serve and enjoy.
Notes
- Use parchment paper for easy removal of the fudge from the pan.
- The texture of the fudge can be adjusted by choosing smooth or crunchy peanut butter according to preference.
- Store fudge in an airtight container at room temperature for up to one week or refrigerate for longer shelf life.
- Make sure to stir constantly during boiling to avoid burning and to get a smooth texture.


