If you have a sweet tooth and love a treat that’s both irresistible and effortless, you’re going to fall head over heels for this Oreo Cookie Balls Recipe. These little delights pack the perfectly nostalgic Oreo crunch combined with creamy, dreamy cream cheese, all wrapped up in a silky chocolate coating. Whether you’re making them for a party, a gift, or simply to enjoy at home, this recipe brings together simple ingredients to create a crowd-pleasing dessert that feels like a special indulgence every single time.
Ingredients You’ll Need
Gathering the right ingredients is the first step toward Oreo cookie bliss. Each component in this Oreo Cookie Balls Recipe plays a crucial role — from texture to taste and that beautiful chocolate finish that makes them so irresistible.
- Oreo cookies: The classic cookie base that provides a crunchy texture and iconic flavor.
- Cream cheese, softened: Adds a smooth, tangy richness that binds the crumbs perfectly.
- Semi-sweet chocolate chips or melting wafers: For the luscious, glossy coating that seals in flavor.
- Optional sprinkles, crushed Oreos, or white chocolate: Fun decorations to make each ball uniquely festive and extra tempting.
How to Make Oreo Cookie Balls Recipe
Step 1: Crush the Oreos
The magic starts by finely crushing the entire package of Oreo cookies into crumbs. A food processor is the best tool here for even crumbs, but if you don’t have one, a zip-top bag and rolling pin work just fine. Crushing the Oreos thoroughly ensures your cookie balls will have the perfect consistency — not too chunky, not too powdery.
Step 2: Mix with Cream Cheese
Next, combine those Oreo crumbs with the softened cream cheese until you get a smooth, cohesive mixture. This step is key because the cream cheese adds a creamy texture that balances the cookie crumbs, giving your Oreo Cookie Balls Recipe that melt-in-your-mouth quality everyone loves.
Step 3: Roll into Balls
Line a baking sheet with parchment paper and roll the Oreo mixture into small, tablespoon-sized balls. This part is fun but also important — making uniform balls helps them cook consistently and look picture-perfect.
Step 4: Chill Your Creations
Place the rolled Oreo balls in the fridge for at least 30 minutes. Chilling firms them up, making the next step of dipping much easier and cleaner.
Step 5: Melt the Chocolate
While the Oreo balls chill, melt your chocolate chips or melting wafers until smooth. You can microwave in short bursts or use a double boiler for careful melting. The smooth, warm chocolate will coat each ball in a luscious shell.
Step 6: Dip and Coat
Dip each chilled Oreo ball into the melted chocolate, fully coating them. A fork helps to lift them out and send excess chocolate back to the bowl, keeping your work area neat and the coating perfect.
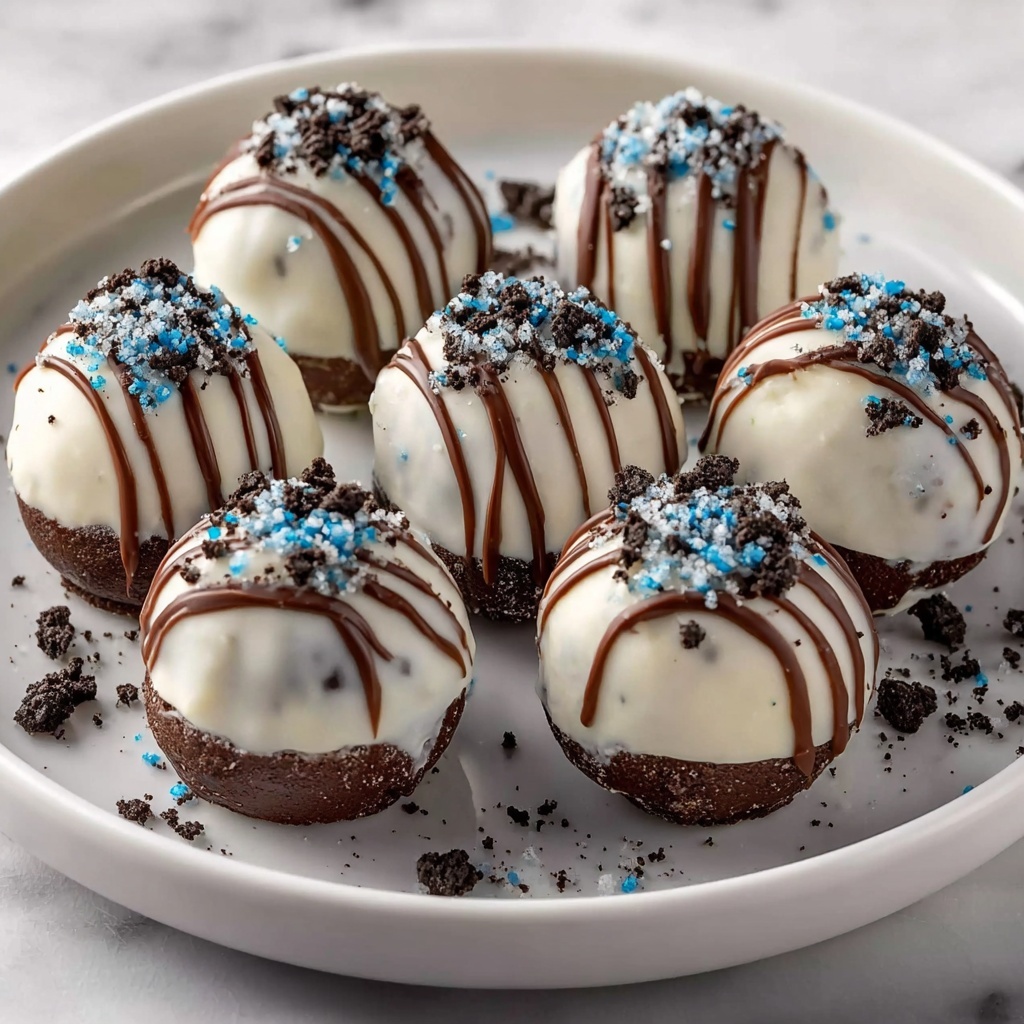
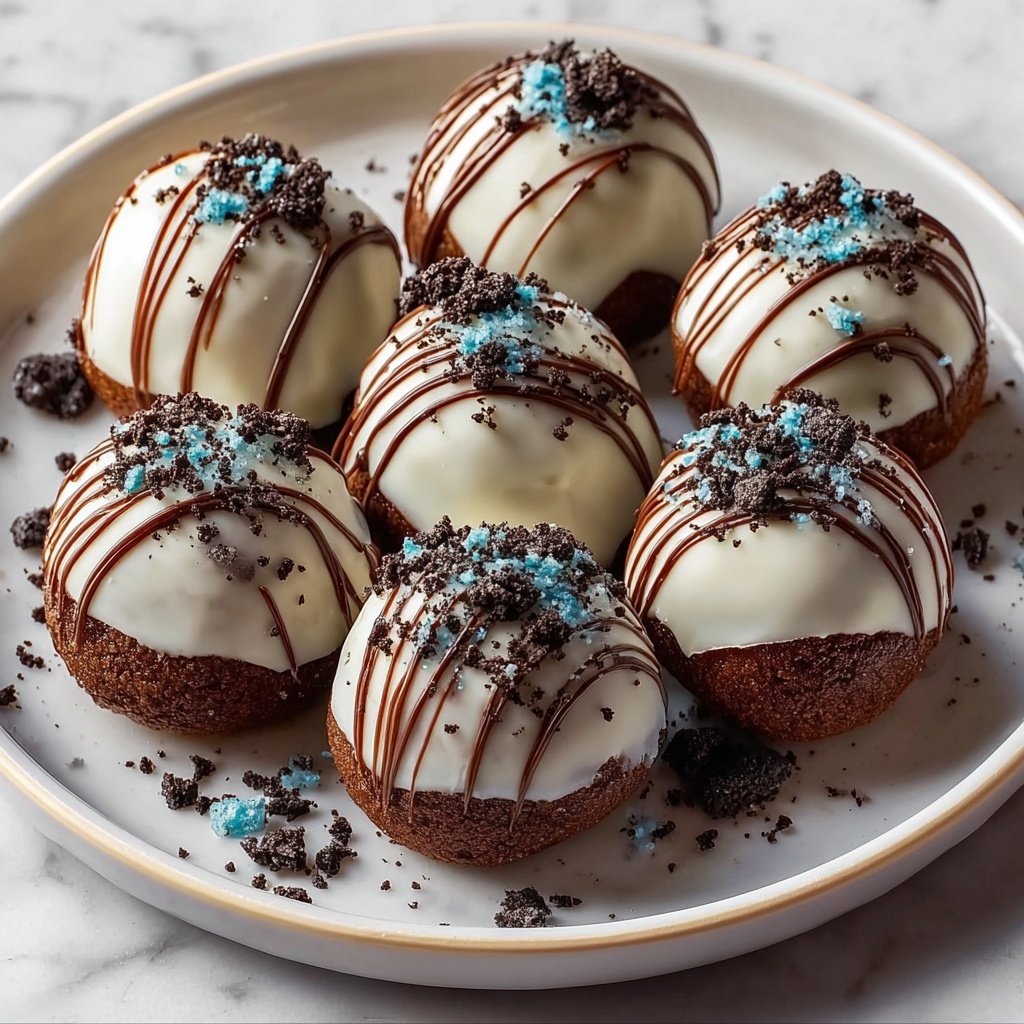
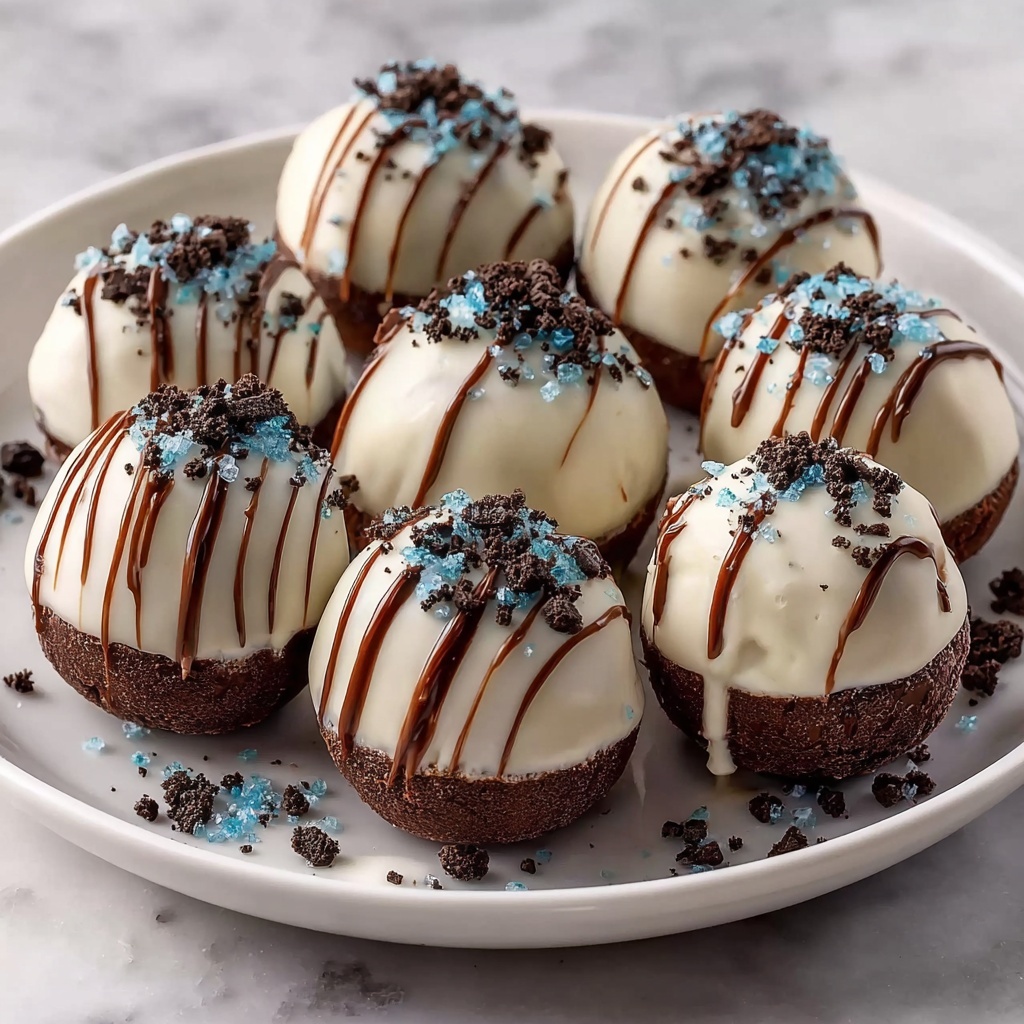
Step 7: Decorate Before Setting
Place the chocolate-coated balls back onto parchment paper. Now’s your chance to sprinkle crushed Oreos, festive sprinkles, or drizzle melted white chocolate for an eye-catching finish. These little touches bring personality and a sparkle of extra flavor.
Step 8: Refrigerate Until Set
Return the finished balls to the fridge for at least 10-15 minutes to ensure the chocolate hardens beautifully. This step guarantees a crisp chocolate shell with that delightful snap when you bite in.
Step 9: Ready to Enjoy
Once the chocolate is firm, your Oreo Cookie Balls Recipe is complete and ready to share. The perfect blend of creamy, crunchy, and chocolatey, these treats are guaranteed to disappear fast!
How to Serve Oreo Cookie Balls Recipe
Garnishes
Adding a garnish not only enhances the appearance but also introduces fun textures and flavors. Fresh sprinkles, crushed Oreos, or a white chocolate drizzle lend a festive flair that makes these cookie balls stand out on any dessert table.
Side Dishes
Serve these delightful bites alongside a chilled glass of milk, a steaming cup of coffee, or a creamy hot chocolate. These pairings create the ultimate cozy experience, perfect for sharing stories and sweet moments with friends and family.
Creative Ways to Present
Elevate the presentation by arranging Oreo cookie balls in colorful cupcake liners or on a tiered dessert stand. For party settings, you can even skewer them on sticks and dip them into decorations before serving. The versatility in presentation means you can tailor these little goodies to any occasion!
Make Ahead and Storage
Storing Leftovers
Oreo cookie balls keep remarkably well in an airtight container kept in the refrigerator for up to a week. This makes them an excellent make-ahead treat that you can prepare in advance for busy days or unexpected guests.
Freezing
If you want to enjoy them later, freeze the Oreo balls in a single layer on a baking sheet first. Once firm, transfer them to a freezer-safe container. They freeze beautifully for up to two months and thaw quickly in the fridge when you’re ready to indulge.
Reheating
Because these are cold treats, reheating isn’t recommended. However, if you want softer cookie balls, allow them to sit at room temperature for 10 to 15 minutes before serving. They soften slightly, releasing more of that creamy, delicious flavor.
FAQs
Can I use different types of cookies?
Absolutely! While classic Oreos give the best flavor for this recipe, you can experiment with flavored Oreos or even other sandwich cookies for unique twists. Just be sure to stick with a similar texture to keep the balls firm enough to roll.
What if I don’t have a food processor?
No worries at all! Placing the Oreos in a sturdy zip-top bag and crushing them with a rolling pin works perfectly. Just be patient to get evenly fine crumbs without turning the cookies into powder.
Can I substitute the cream cheese?
Cream cheese is essential here because of its taste and texture, but you could try mascarpone for a slightly richer flavor. Just avoid anything too soft or liquidy, as it will affect the mixture’s firmness.
How do I store these at room temperature?
Oreo cookie balls are best stored in the refrigerator due to the cream cheese and chocolate coating. At room temperature, they may become too soft and lose their shape quickly, especially in warm weather.
Can I make them vegan or dairy-free?
With some substitutions, yes! Use dairy-free cream cheese and vegan chocolate melts, and make sure the Oreos you choose fit your dietary needs. The texture and taste may vary slightly, but they still make an amazing treat.
Final Thoughts
There’s something truly special about the simplicity and indulgence of this Oreo Cookie Balls Recipe. It’s the perfect mix of nostalgic flavors and easy preparation that anyone can master and enjoy. Whether you’re making them for a celebration or just because, these decadent little bites are sure to bring smiles and sweet moments to everyone who tastes them. Go ahead, try making a batch — trust me, you’ll want to keep these in your dessert rotation forever!
Print
Oreo Cookie Balls Recipe
- Prep Time: 0h 20m
- Cook Time: 0h 5m
- Total Time: 0h 25m
- Yield: Approximately 36 Oreo cookie balls
- Category: Dessert
- Method: No-Cook
- Cuisine: American
Description
Delicious and easy-to-make Oreo Cookie Balls featuring crushed Oreos and cream cheese rolled into bite-sized balls and coated in smooth melted chocolate. Perfect for parties, dessert tables, or a sweet snack.
Ingredients
Oreo Mixture
- 1 package (14 oz) Oreo cookies
- 8 oz cream cheese, softened
Chocolate Coating
- 12 oz semi-sweet chocolate chips or chocolate melting wafers
- Optional: Sprinkles, crushed Oreos, or white chocolate for decoration
Instructions
- Crush the Oreos: Place the entire package of Oreo cookies into a food processor and pulse until finely crushed into even crumbs. If you don’t have a food processor, place the cookies in a zip-top bag and crush them with a rolling pin.
- Mix with Cream Cheese: In a large mixing bowl, combine the crushed Oreos with the softened cream cheese. Mix thoroughly until the mixture is well combined and smooth in consistency.
- Form the Balls: Line a baking sheet with parchment paper. Roll the Oreo mixture into small balls about the size of a tablespoon and place them on the baking sheet, making approximately 36 balls.
- Chill the Balls: Refrigerate the balls for at least 30 minutes to 1 hour to firm up before coating.
- Melt the Chocolate: Melt the chocolate chips or wafers in a microwave-safe bowl by heating in 30-second intervals, stirring between each until smooth. Alternatively, use a double boiler over simmering water to melt.
- Dip the Oreo Balls: One at a time, dip the chilled Oreo balls into the melted chocolate, ensuring a full coating. Use a fork to lift them out and allow excess chocolate to drip off.
- Decorate: Place the chocolate-coated balls back onto the parchment-lined baking sheet. Optionally, sprinkle with crushed Oreos, sprinkles, or drizzle with melted white chocolate before the coating sets.
- Set the Chocolate: Refrigerate again for 10-15 minutes to allow the chocolate coating to firm up.
- Serve and Enjoy: Once the chocolate is set, the Oreo cookie balls are ready to serve and enjoy.
Notes
- Softened cream cheese helps achieve a smooth mixture; avoid overheating.
- Ensure Oreo balls are well chilled before dipping to prevent melting or breaking.
- Use parchment paper to prevent sticking and ease cleanup.
- Store finished cookie balls in an airtight container in the refrigerator for up to a week.
- Variations include using white chocolate coating or adding flavor extracts to cream cheese mixture.


