If you are hunting for a wildly delicious, irresistibly melty, and crispy taco experience, then this Crispy Cheesy Quesabirria Tacos Recipe is going to blow you away. Imagine juicy, tender beef simmered in rich, smoky chilies, perfectly shredded and wrapped with gooey cheese inside a tortilla that’s crispy on the outside with every bite. This dish beautifully blends the warmth of Mexican flavors with the fun, satisfying crunch and cheesiness that makes quesabirria tacos a beloved street food favorite. Trust me, once you try this recipe, you’ll be making it again and again for friends, family, or a special treat just for yourself.
Ingredients You’ll Need
These ingredients are straightforward but crucial in building the deep, layered flavors and textures that make this recipe shine. Each component has a role, from the dried chilies that create the gorgeous sauce to the cheese that adds creamy goodness, all contributing to that perfect bite.
- 2 lbs beef chuck roast or short ribs: Choose well-marbled beef for tender, flavorful results after slow cooking.
- 2 dried guajillo chilies: These provide a mild heat with fruity undertones—essential for authentic flavor.
- 2 dried ancho chilies: Add mild smokiness and richness to the sauce.
- 1 dried pasilla chili (optional): Extra depth and complexity in the chili blend for chili lovers.
- 1 medium onion, quartered: Adds subtle sweetness and body to the braising liquid.
- 4 cloves garlic, smashed: A punch of pungency that melds wonderfully with the chilies.
- 2 bay leaves: Infuse warm, herbal notes into the broth.
- 1 cinnamon stick: Lends a slight aromatic sweetness that elevates the sauce.
- 4 cups beef broth (or water): The cooking liquid that melds all flavors together.
- 1 teaspoon cumin: Earthy spice that enhances the meatiness of the beef.
- 1 teaspoon oregano: Adds herbal brightness to balance the rich sauce.
- 1/2 teaspoon black pepper: Freshly cracked for gentle heat and warmth.
- Salt to taste: Enhances every flavor without overpowering.
- 10-12 corn tortillas: Traditional base; look for fresh, soft tortillas for best texture.
- 2 cups shredded mozzarella cheese (or Oaxaca cheese): Creamy, stringy cheese that melts beautifully inside.
- Fresh cilantro, chopped (for garnish): Adds a burst of freshness to finish.
- 1/2 cup finely diced onion (for garnish): Crunchy accents that brighten the tacos.
- Lime wedges (for serving): Zesty finish that cuts through the richness.
- Oil for frying: Just enough to crisp up your tortillas perfectly.
- 1 1/2 cups reserved birria broth (from braising the beef): Used for dipping tortillas to give them extra flavor and moisture.
- 1 small onion, finely chopped: Mixed into dipping consommé for extra punch.
- 1 clove garlic, minced: Layered into the consommé for flavor complexity.
- 1 tablespoon vinegar: Balances the dipping sauce with a bright tang.
- 1/2 teaspoon chili powder (optional): For those who want an extra kick in the dip.
How to Make Crispy Cheesy Quesabirria Tacos Recipe
Step 1: Toast the Chilies
Begin by removing stems and seeds from your dried guajillo, ancho, and pasilla chilies. Toast them gently in a dry skillet over medium heat just until they release a fragrant aroma, about 2 to 3 minutes. This toasting process is the key to unlocking deep, smoky flavors that build the soul of the birria sauce. Be careful not to let them burn, as that will make the sauce bitter.
Step 2: Blend the Chili Sauce
Once toasted, toss the chilies into a blender along with quartered onion, smashed garlic, cumin, oregano, and black pepper. Add one cup of beef broth to help everything blend smoothly into a velvety sauce. If the texture is too thick, gradually add more broth until you reach a nice pouring consistency. This chili blend is aromatic, vibrant, and will infuse the beef with incredible flavor.
Step 3: Brown the Beef
Heat a bit of oil in a large pot or Dutch oven over medium-high heat. Brown the beef chunks in batches, letting each side get a golden crust before turning. This searing seals in the meat’s juices and adds dimension of flavor beyond just braising.
Step 4: Simmer the Birria
In the same pot, pour in your freshly blended chili sauce and cook it for about five minutes, stirring occasionally to deepen its flavor. Add remaining beef broth, bay leaves, cinnamon stick, and the browned beef back into the pot. Bring everything to a boil, then reduce heat to low and cover. Let it simmer gently for 2 to 3 hours or until the beef is so tender it easily shreds with a fork.
Step 5: Shred and Reserve Broth
Remove the beef from the pot and shred it with two forks. Discard the bay leaves and cinnamon stick—no one wants those surprises in every bite. Reserve about 1 1/2 cups of the delicious, richly flavored broth for dipping your tacos later. This broth, or consommé, is one of the highlights and adds even more indulgence to your final dish.
Step 6: Prepare the Dipping Sauce
Make the consommé extra tempting by combining reserved broth with finely chopped onion, minced garlic, vinegar, and optional chili powder in a small saucepan. Let it simmer gently for 5 to 10 minutes, then season with salt to taste. This sauce will be a dipping marvel, balancing acidity, spice, and savory notes.
Step 7: Soften and Crisp Tortillas
Heat a skillet or griddle and lightly oil it. Dip your corn tortillas into the reserved birria broth to soften and flavor them before placing each on the skillet. This step ensures every bite packs that signature punch of savory goodness and keeps tortillas supple before crisping.
Step 8: Assemble the Tacos
Sprinkle a generous handful of shredded cheese on one half of each tortilla, then pile on a hearty portion of the tender shredded birria beef. Fold the tortilla over to form a taco, stuffed with cheese and meat that promises melty, savory perfection in every bite.
Step 9: Crisp the Tacos
Cook each side of your folded tacos for 2 to 3 minutes on medium heat. This step crisps the tortillas to a perfect golden brown while melting the cheese inside, creating that delightful crunch-and-cheese combo that sets quesabirria tacos apart from any other taco experience.
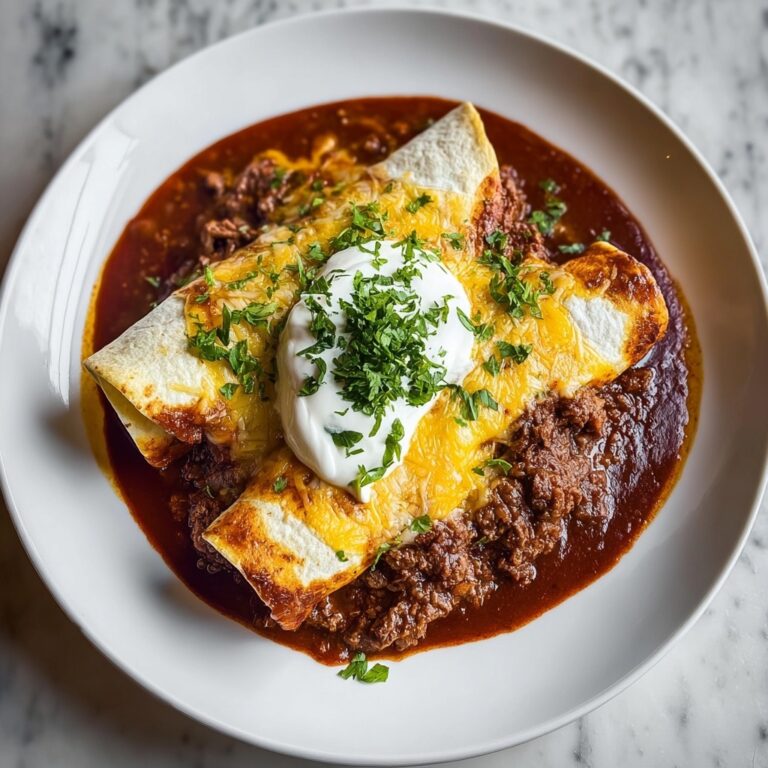
Step 10: Garnish and Serve
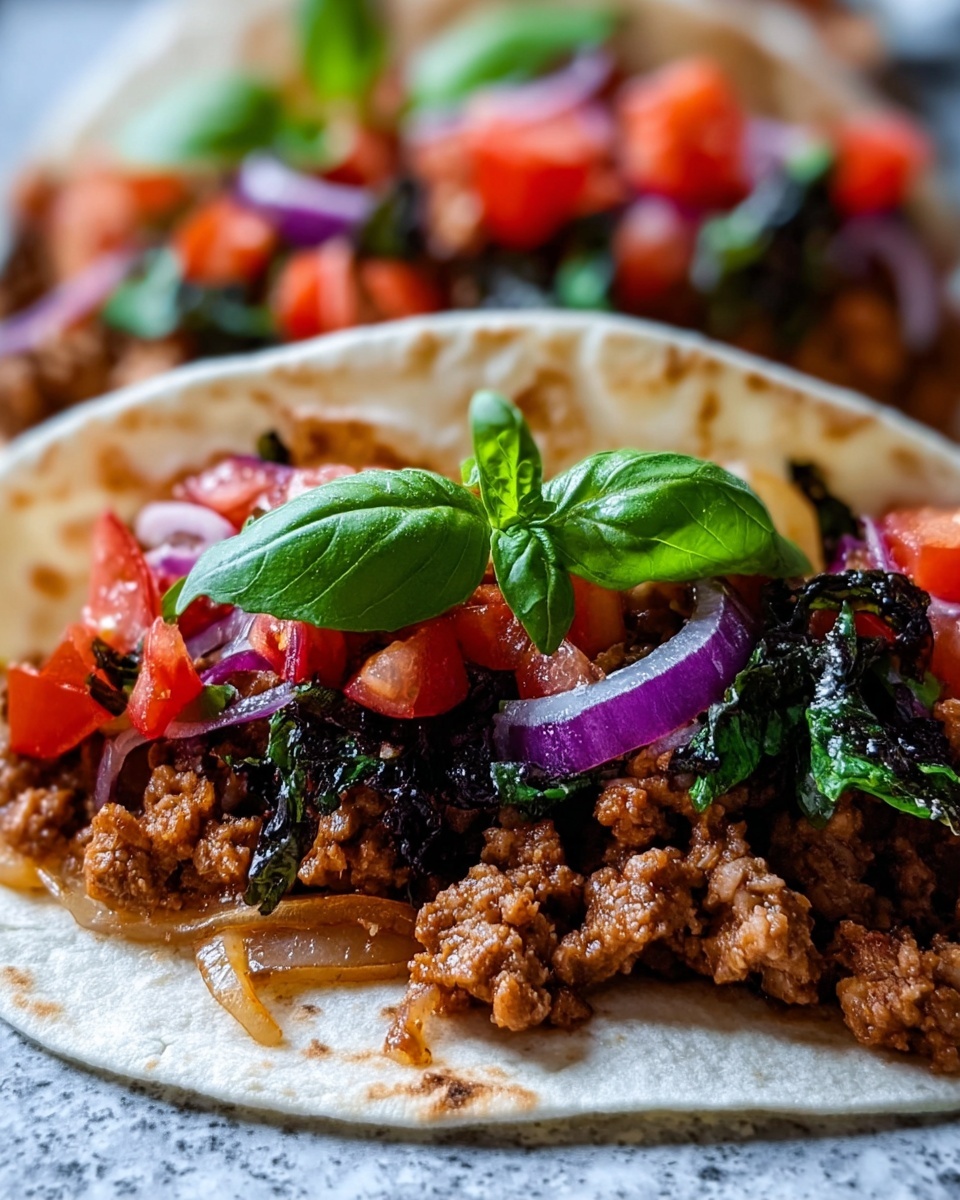
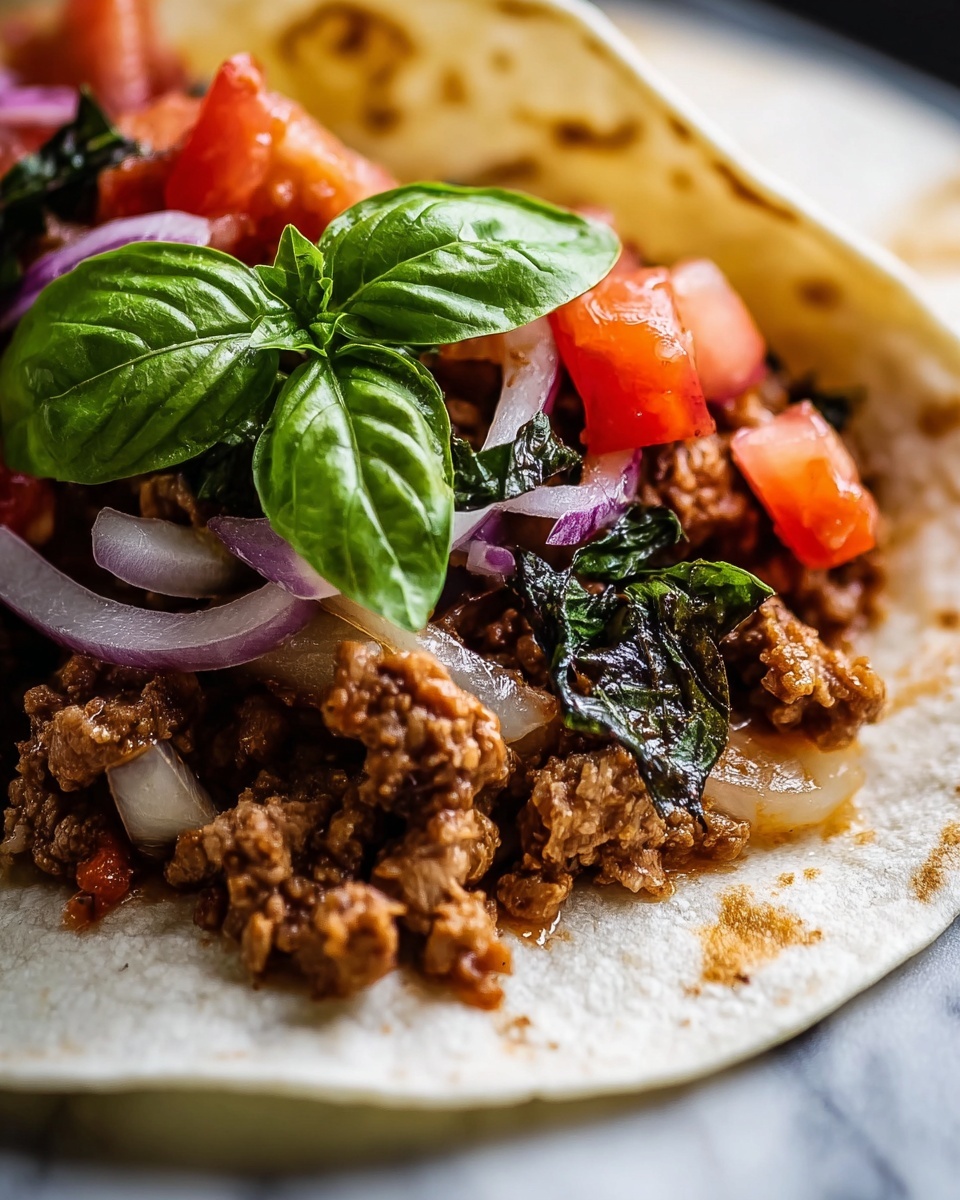
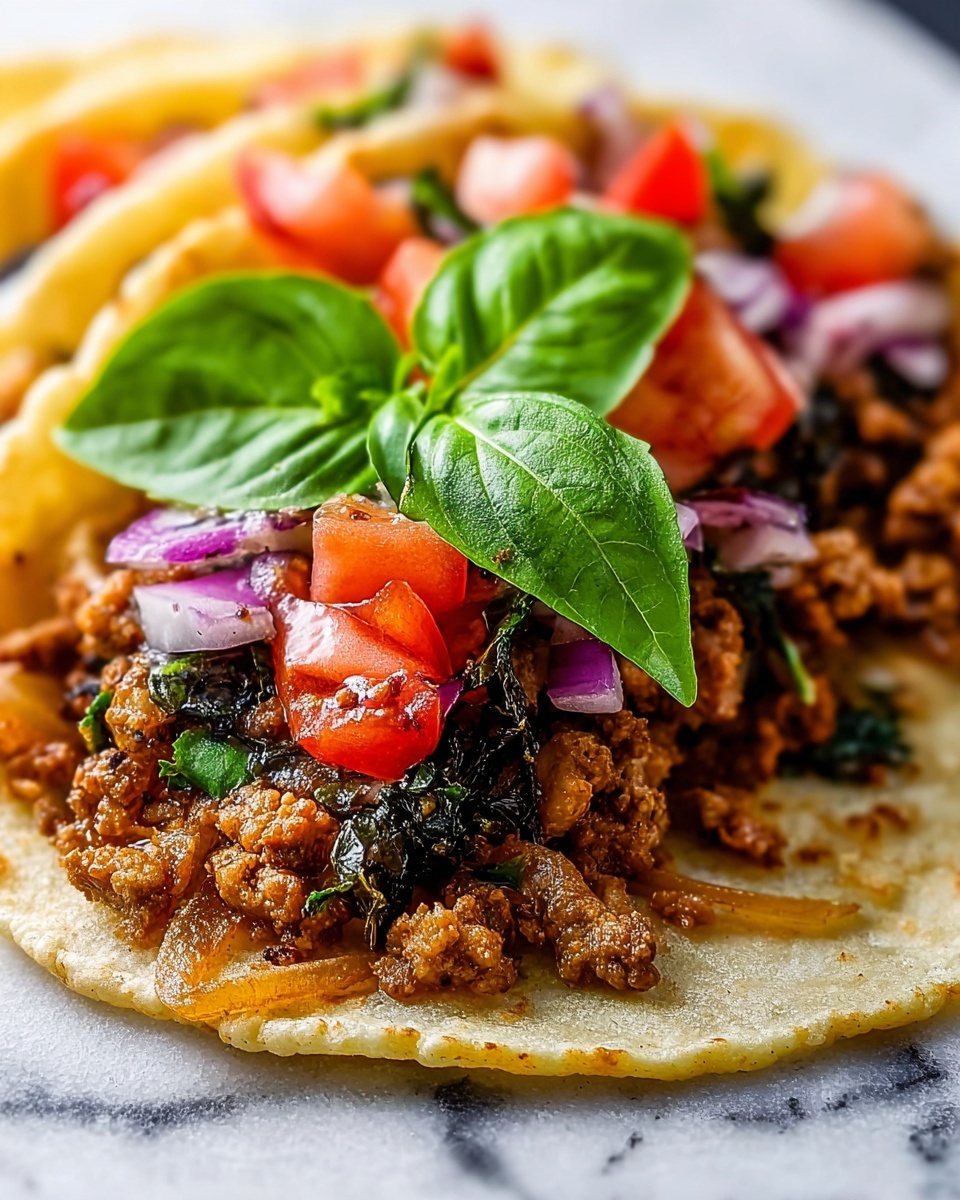
Remove tacos from the skillet, then sprinkle them with freshly chopped cilantro and diced onion for brightness and texture. Serve immediately with lime wedges and the irresistible birria consommé for dipping. Each bite is a celebration of textures and flavors—a crispy shell, gooey cheese, juicy meat, fresh herbs, and zesty lime.
How to Serve Crispy Cheesy Quesabirria Tacos Recipe
Garnishes
A simple garnish can elevate your tacos to restaurant-worthy status. Fresh cilantro and diced onions add herbal brightness and a satisfying crunch that contrast the rich meat and cheese beautifully. Don’t skip the lime wedges either—a quick squeeze brings a lively acidity that freshens the palate.
Side Dishes
Keep sides light and complementary. Classic Mexican pickled vegetables, a simple cabbage slaw, or a tangy salsa verde are perfect choices. For something heartier, consider Mexican rice or refried beans, but honestly, these tacos shine so brightly on their own that they can easily be the star of the meal.
Creative Ways to Present
For a fun twist, try serving these tacos as a DIY platter where everyone assembles their own with bowls of garnishes and the consommé to dip tortillas. Or make a quesadilla-style open-faced version with extra cheese for gooey sharing. These ideas make the Crispy Cheesy Quesabirria Tacos Recipe a festive centerpiece at any gathering.
Make Ahead and Storage
Storing Leftovers
You can store leftover braised beef and broth in airtight containers in the refrigerator for up to 4 days. Keep tortillas separate to avoid sogginess. When ready to eat, reheat the beef gently on the stovetop and crisp up tortillas fresh.
Freezing
The shredded birria beef freezes beautifully. Portion it into freezer-safe bags or containers and freeze for up to 3 months. Thaw overnight in the fridge before reheating slowly over low heat with a splash of broth to retain moisture.
Reheating
Reheat your quesabirria tacos by assembling with fresh or leftover tortillas and briefly crisping in a hot skillet. Warm the beef with some saved broth to revive juiciness. The consommé can be refreshed with a quick simmer and served warm for dipping to maintain that authentic experience.
FAQs
Can I use beef other than chuck roast or short ribs?
Yes! While chuck roast and short ribs are preferred for their tenderness and marbling, you can also use brisket or even stew beef. The key is slow cooking until very tender to replicate that melt-in-your-mouth texture.
What is the best cheese to use for quesabirria tacos?
Mozzarella is a great everyday option for melty stretchiness, but if you want authentic flavor, Oaxaca cheese is traditionally used and lends a creamy, slightly tangy profile that complements the beef perfectly.
Can I make this recipe without dried chilies?
Dried chilies are essential for the authentic flavor of quesabirria sauce, but in a pinch, you can substitute with chili powders or sauces. Just keep in mind that the depth and smoky characteristics may be less pronounced.
How spicy are quesabirria tacos?
The chili blend provides warmth and mild spice but is not overwhelmingly hot. You can adjust the heat by adding or omitting the pasilla chili and the optional chili powder in the consommé to suit your taste.
What is the best way to enjoy leftover quesabirria tacos?
Leftovers are fantastic reheated on the skillet to bring back crispiness. Serve with warmed consommé for dipping, and a fresh handful of cilantro, onion, and lime to revive the fresh flavors. They taste almost as good as freshly made!
Final Thoughts
You simply cannot go wrong with this Crispy Cheesy Quesabirria Tacos Recipe. It’s a heartwarming, fun, and deeply flavorful meal that combines textures and tastes in the most joyful way possible. Whether you’re hosting friends or craving a comforting night in, these tacos are certain to hit the spot. Give this recipe a try—your taste buds will thank you, and you might just find your new favorite comfort food.